Recipes › DIYs
How to Make Bulgur Wheat at Home
By Samira Kazan
updated November 14, 2023


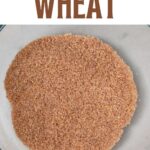

How to make bulgur wheat at home – a par-boiled, dried, and cracked wheat that is perfect for making tabbouleh salad , using instead of rice or couscous, and within Middle-Eastern/Mediterranean cuisine!

Want to save this recipe?
- What is Bulgur Wheat?
- The Ingredients/Materials
- How to Make Bulgur Wheat
- How to Store
- How to Use Bulgur Wheat
- FAQs
- Method Top Tips
- Related Recipes & DIYs
- How to Make Bulgur Wheat at Home Recipe
What is Bulgur Wheat?
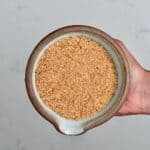
If you’ve never (or rarely) used bulgur wheat (burghul), you may be mistaken into thinking this is a type of grain/wheat. In fact, bulgur wheat is simply wheat berries (this can be from several types of wheat species but mostly durum wheat, which is also used for pasta and couscous) that are par-boiled until the wheat berries are about to crack open, and then “cracked”/ground down in several grind types (including fine, medium, coarse, and extra coarse).
The resulting ingredient is very popular in Mediterranean and Middle East cuisine. While it’s often confused with “cracked wheat,” the two aren’t the same since bulgur wheat is par-booked and cracked wheat is not. For that reason, bulgur wheat doesn’t actually require any further cooking; soaking is enough (as is done for tabbouleh ). However, you can also cook it further, too – for example as a pilaf or with sauces, etc.
While bulgur wheat isn’t hard to find in grocery stores here in the UK, that isn’t the case everywhere, though. So I thought I’d take you through how to make bulgur wheat from wheat berries.
For more simple DIYs you might enjoy, feel free to check out my posts for homemade crispy onions , harissa paste , homemade bouillon cubes (and powder), homemade herb salt , date syrup , and pomegranate molasses !
The Ingredients/Materials
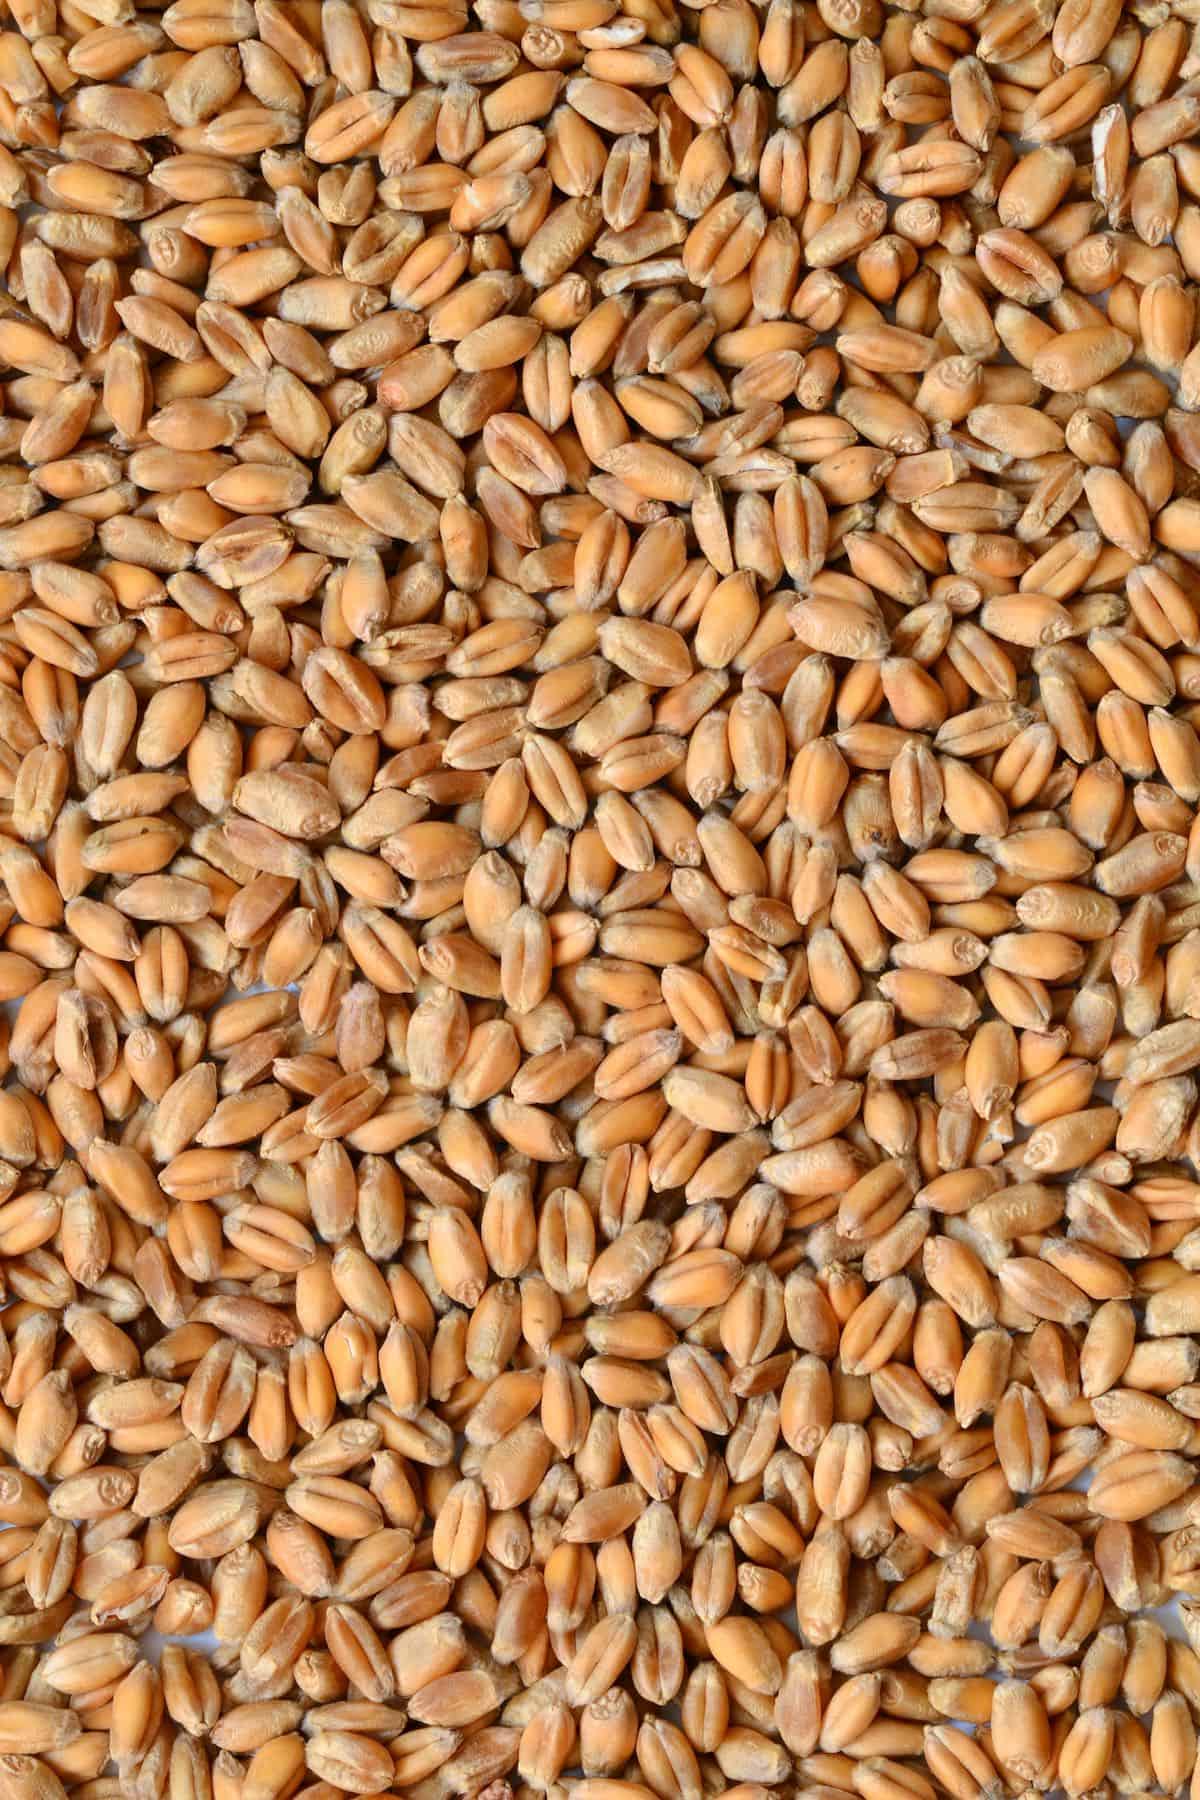
- Wheat: there are several types of wheat you can use. However, I recommend durum wheat.
- Grinding tool : you have several options for grinding the wheat, including a blender, grain mill, spice grinder, or even a ziplock bag and a rolling pin.
- Strainers : to easily sift the ground bulgur wheat into different categories (fine, medium, coarse), you’ll need at least two strainers. You’ll need one fine-mesh sieve and one medium. You could even use one slightly larger one too (to separate the coarse and extra coarse pieces).
How to Make Bulgur Wheat
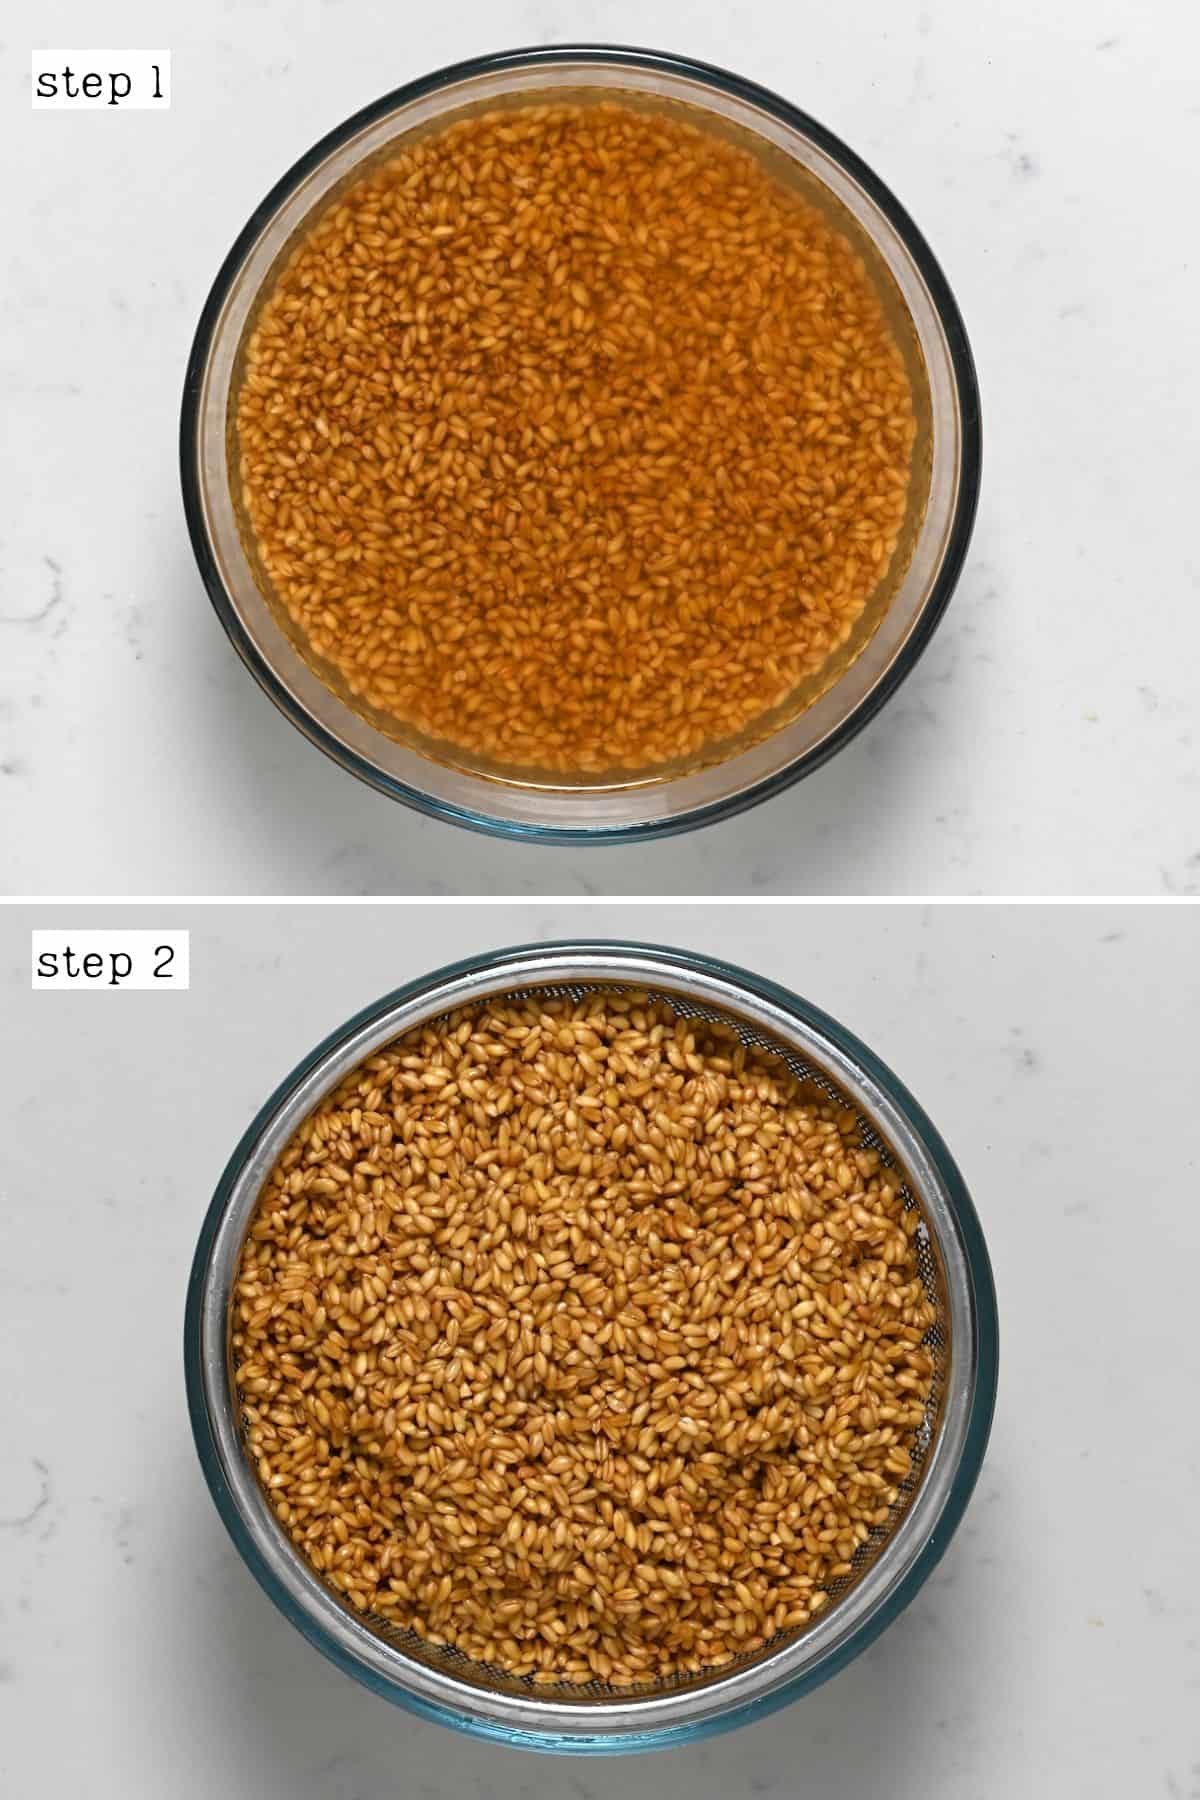
Step 1: Soak the wheat
First, transfer the wheat to a large bowl with enough cold water to cover it by 2-inches. Then leave it to soak overnight.
Quick soak method: alternatively, you can use boiling water and leave it to soak for around 2-3 hours .
Step 2: Cook the wheat
Next, we need to cook the wheat berries until al dente. To do this, combine the wheat and enough water to cover them with at least an inch. Bring to a boil, then simmer for between 60-80 minutes. The wheat is ready when it breaks down easily when pressed between your finger and thumb.
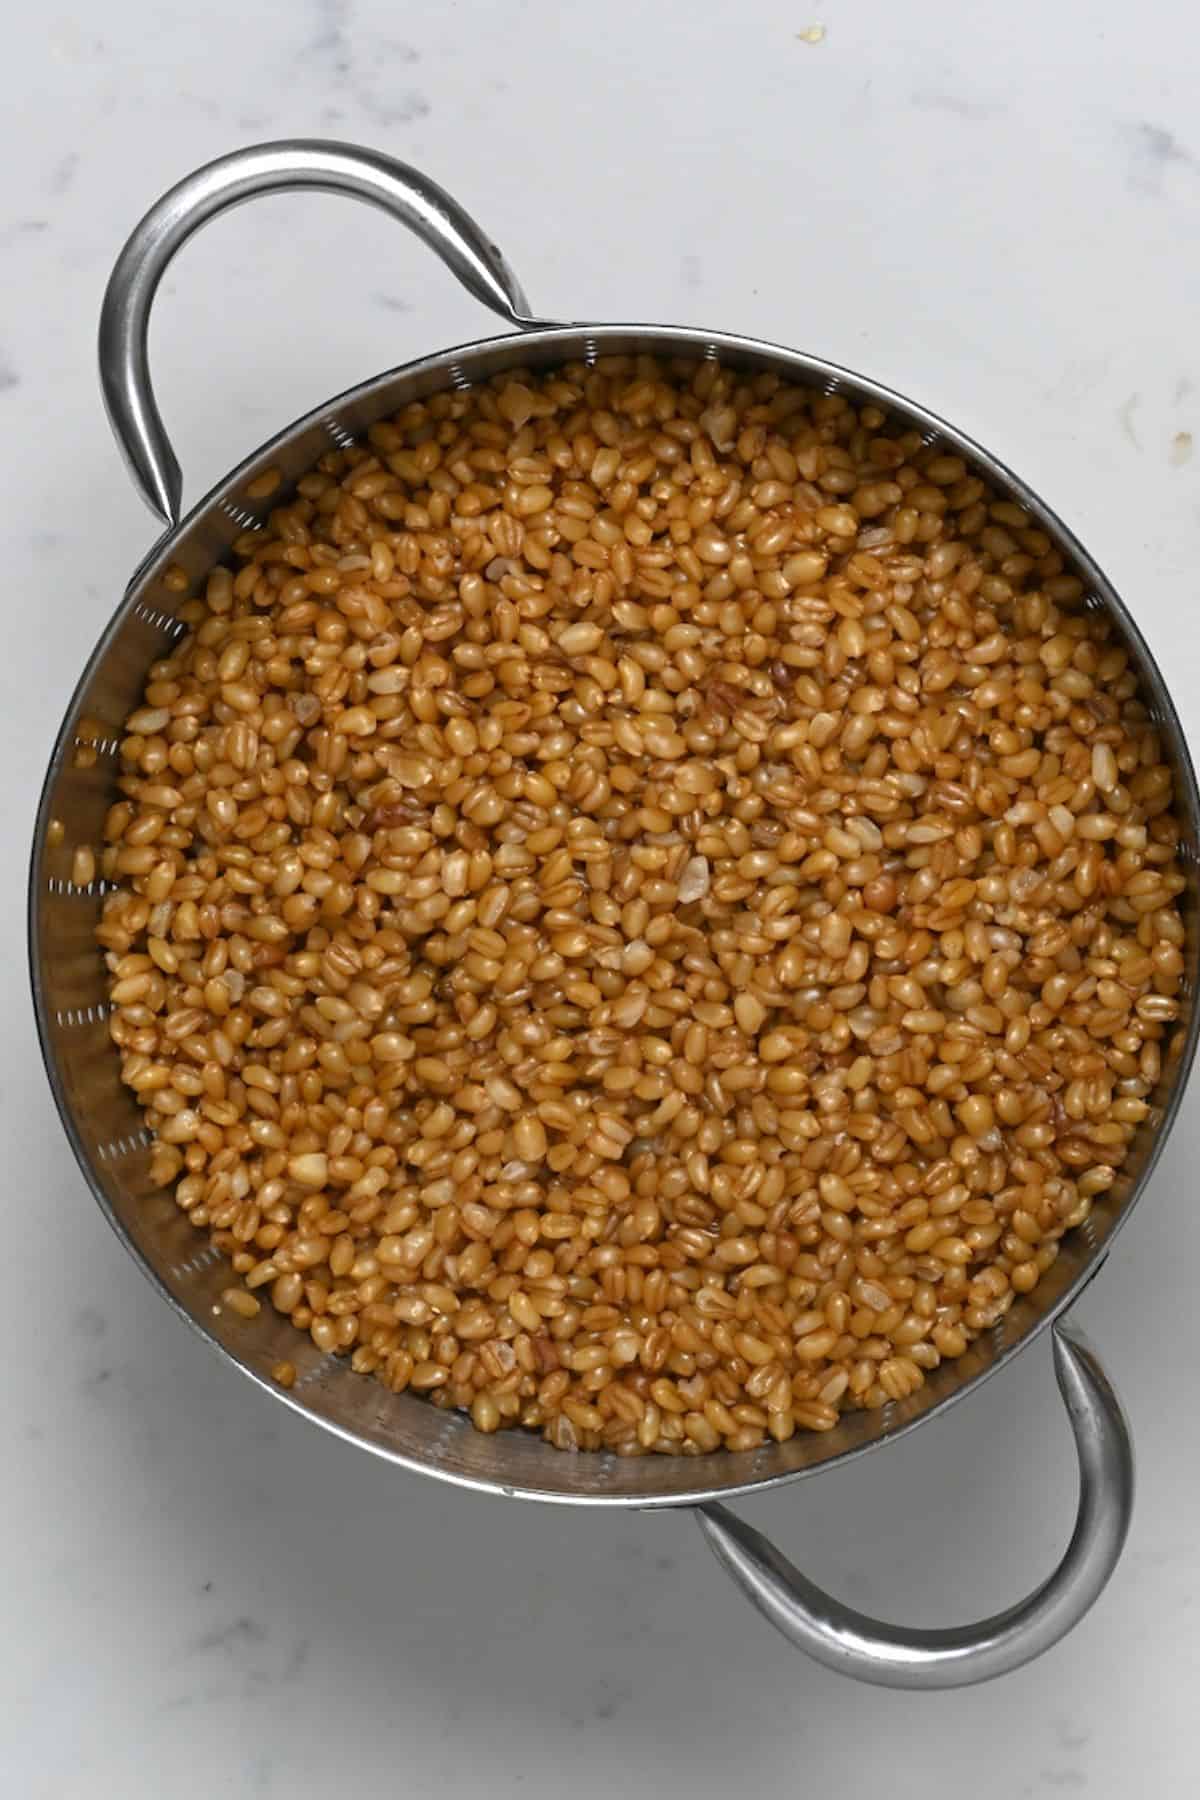
Step 3: Leave it to dry
There are three ways to leave the wheat to dry: air-drying, in the oven, or using a dehydrator.
To air-dry, spread the wheat in a single layer across a large tray (or multiple trays if needed). Then leave until fully dry. This method is best done in warm/dry climates and can take up to 2 days to fully dry.

Alternatively, you can spread them across dehydrator trays or oven trays and dehydrate at 100ºF/40ºC (if your oven goes that low) until fully dried – which should only take several hours.
Lastly, you could spread them across baking trays in the oven at 200ºF/95ºC until they are dried enough to “crack” easily – this is usually between 1-2 hours.
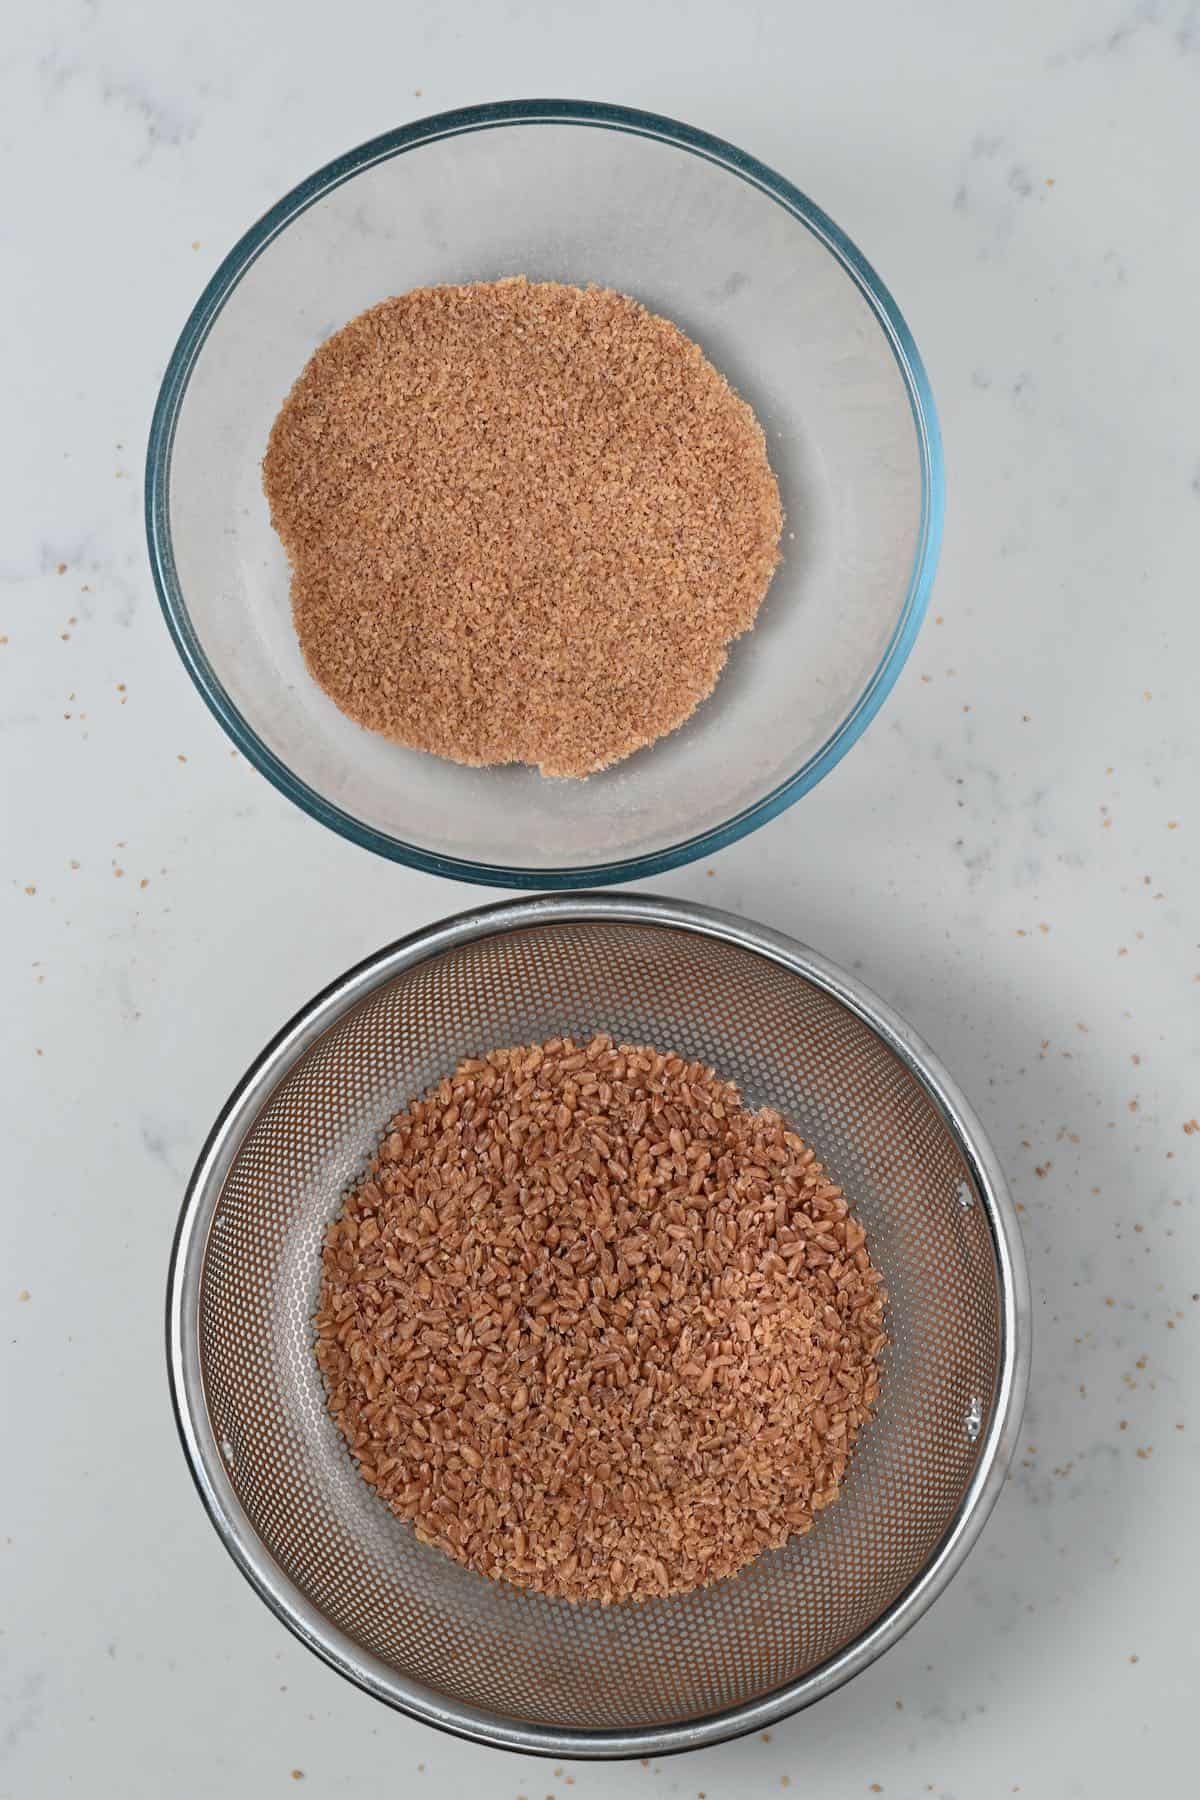
Step 4: Grind the wheat
You can either use a blender, grain mill, spice grinder, or even a ziplock bag and a rolling pin to crack the wheat. The amount you grind them for will impact their coarseness.
I recommend doing this in small batches so you don’t over-blend/process the grains closest to the blade. When using a spice grinder, I recommend using it for 20-30 seconds, shaking a little. For a high-speed blender, pulse and shake the jug to more evenly grind the wheat.
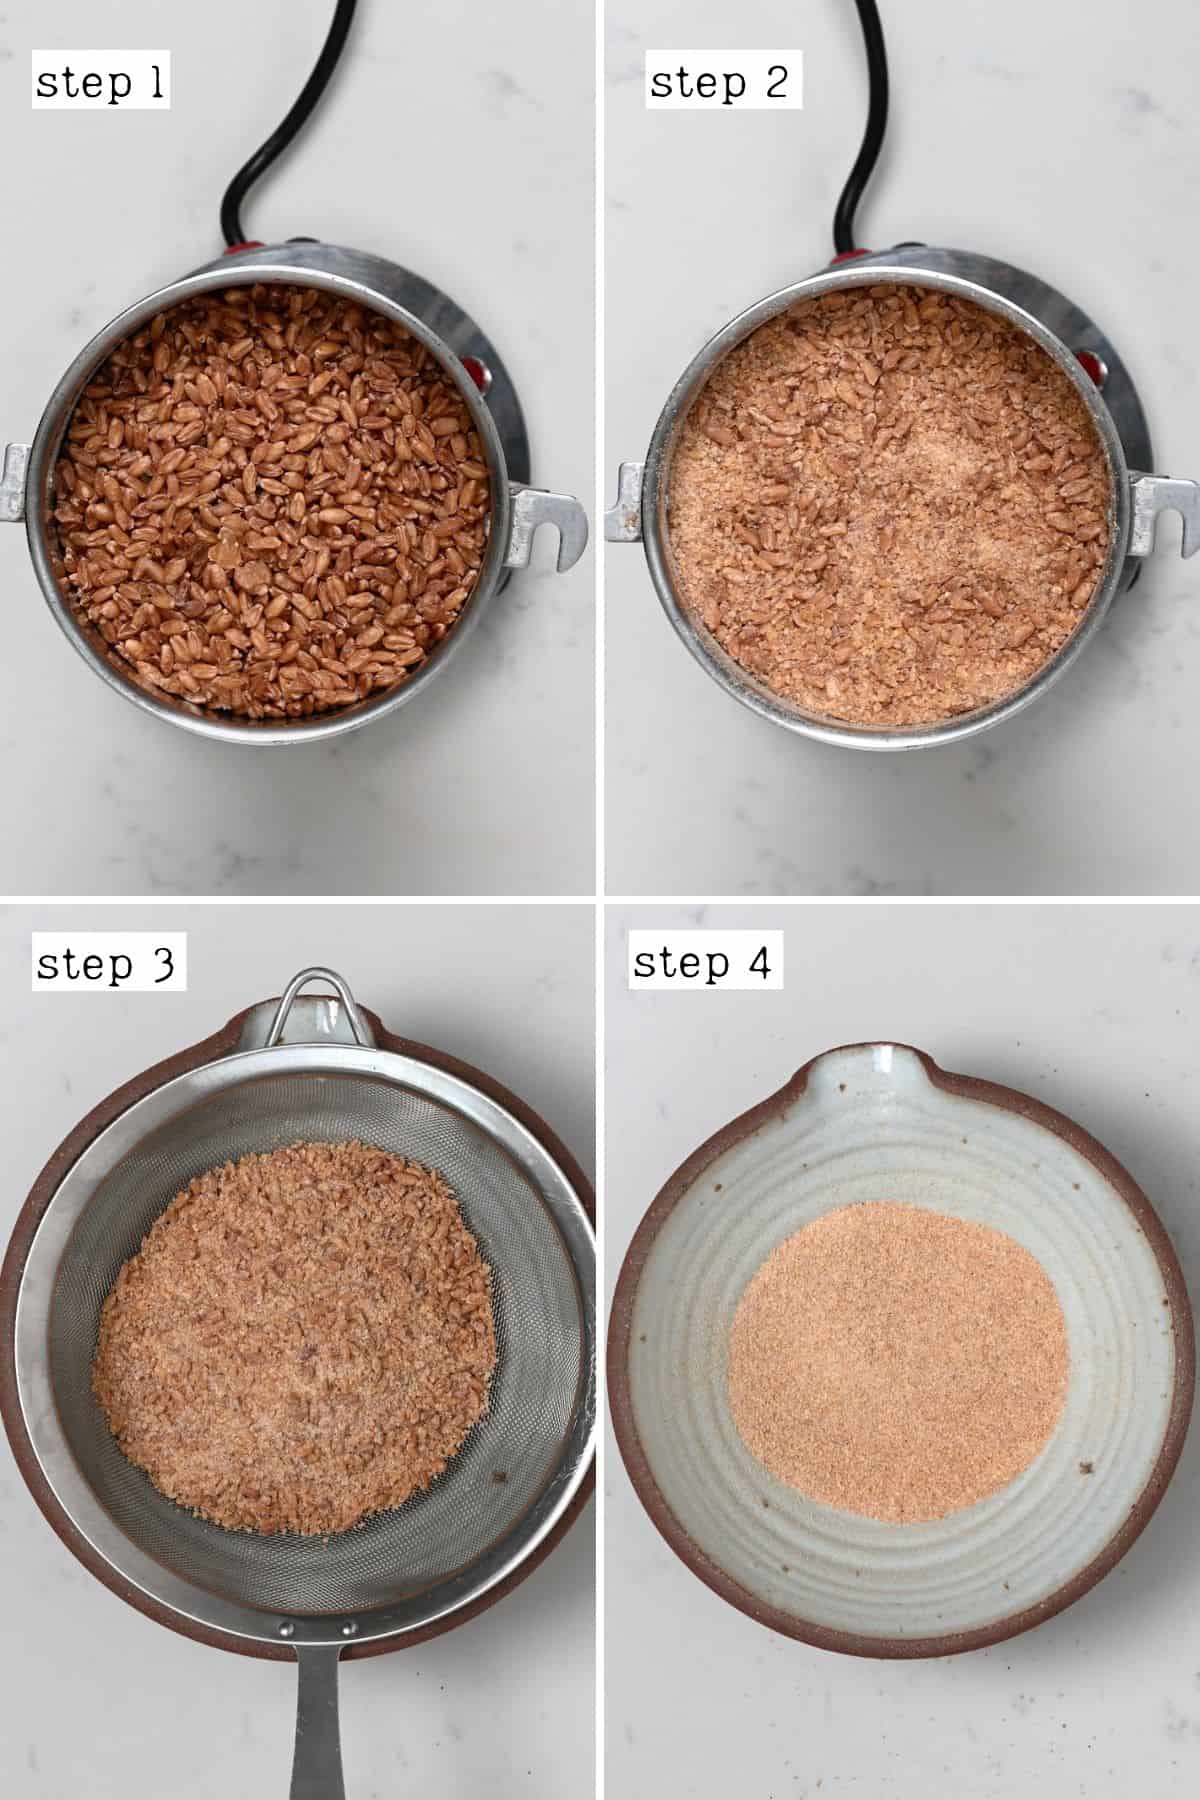
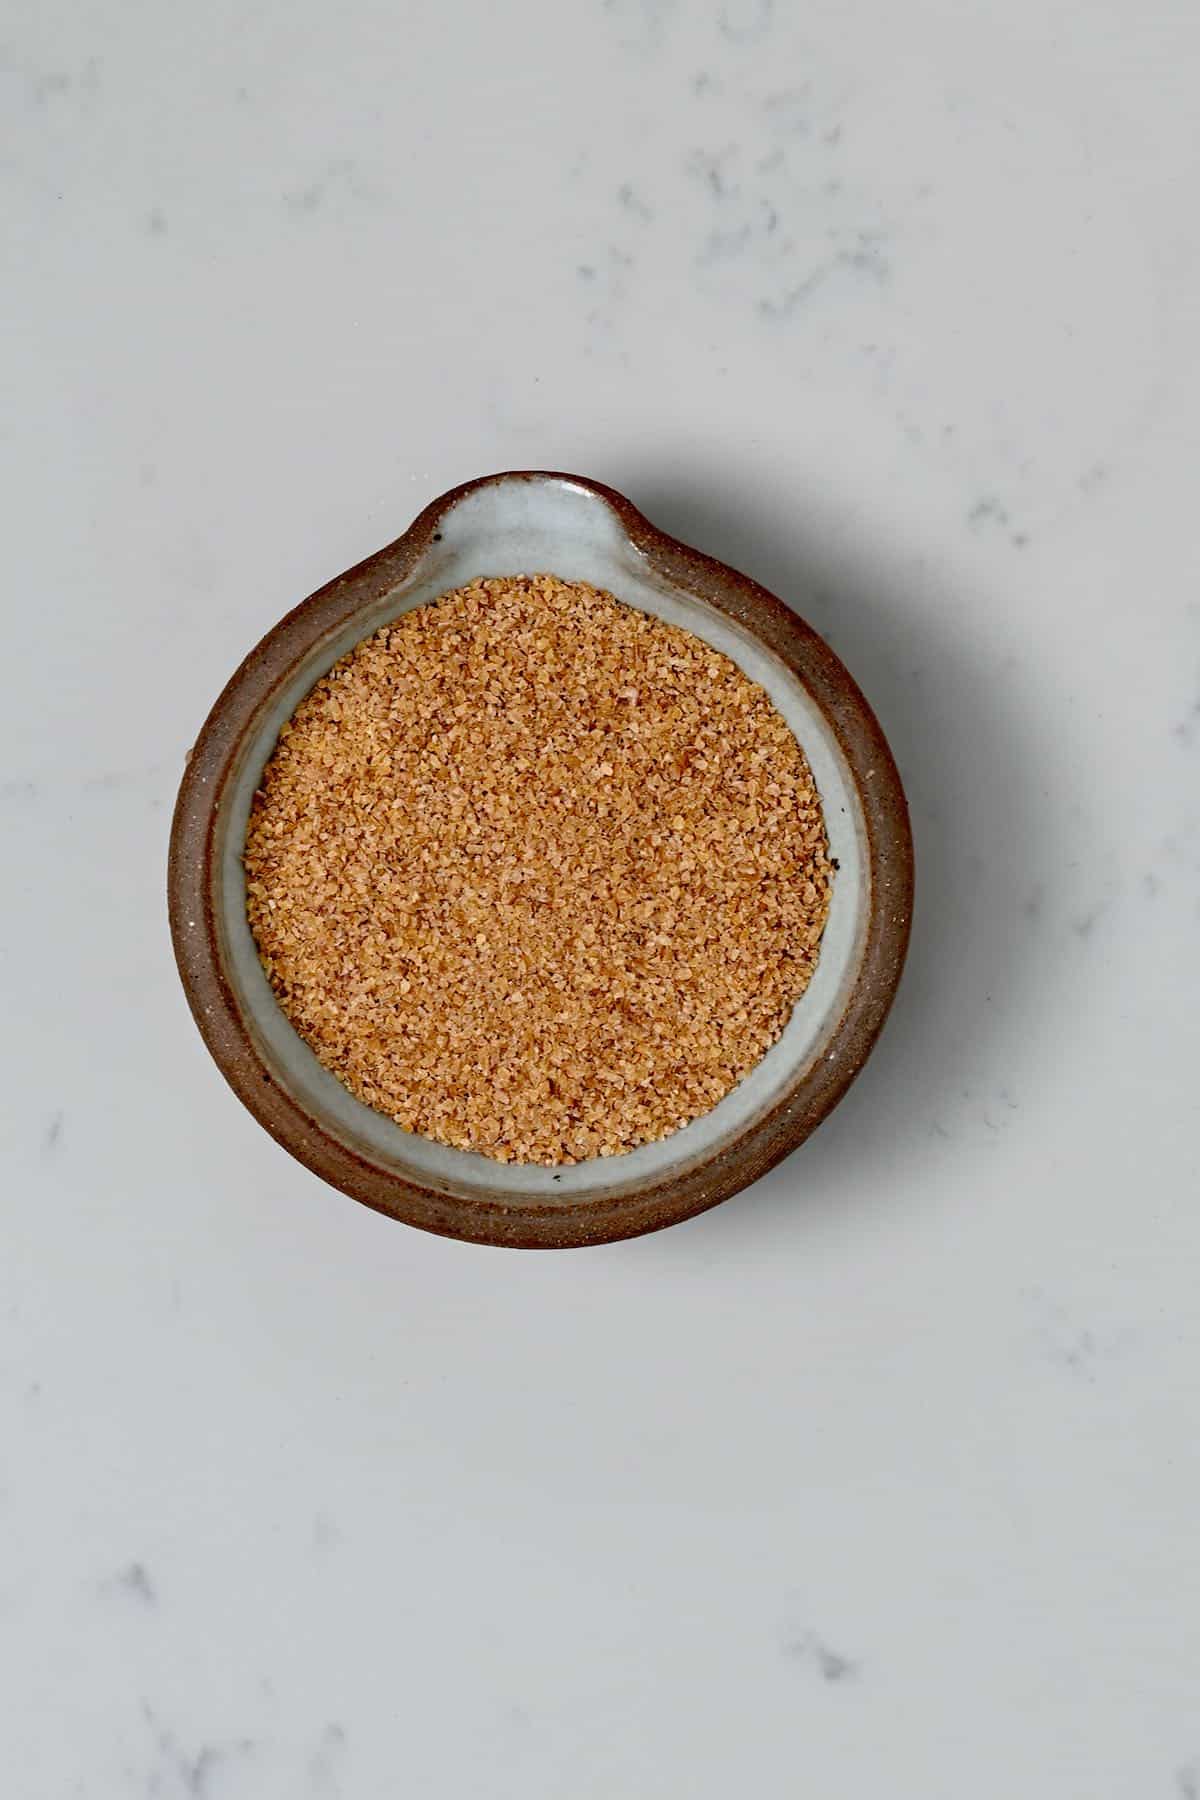
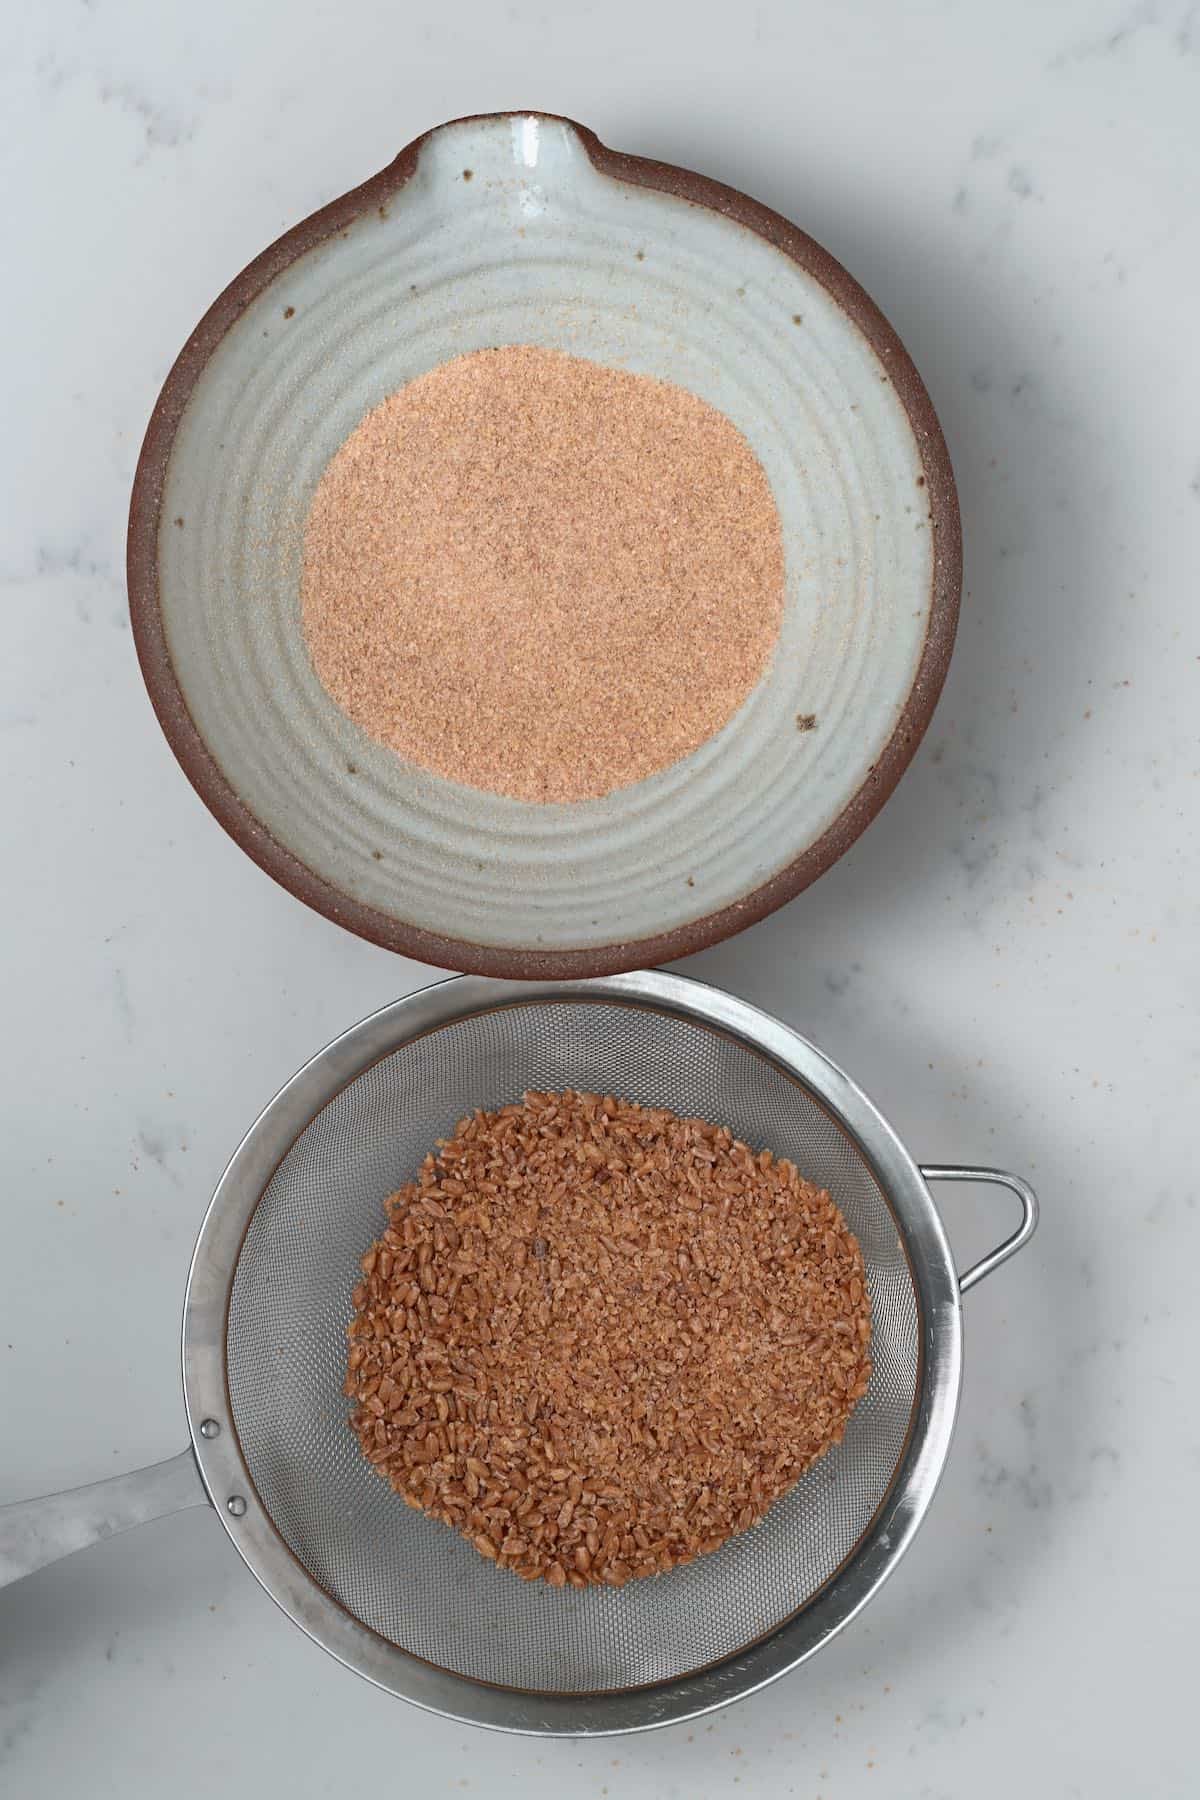
Lastly, it’s time to sift/sieve the mixture to separate the different coarseness of the bulgur wheat. First, use a fine-mesh sieve to first strain the “floury” consistency (this can be used as superfine/fine bulgur for puddings, etc.).
Then use a sieve with slightly larger holes to sift once more. The sifted bulgur will be a “medium” coarseness bulgur. The remaining unsifted bulgur wheat will be a combination of coarse/extra-coarse.
How to Get the Perfect Bulgur Texture
If you’ve ever bought bulgur from the store, you might have noticed it comes in different textures – coarse, medium, fine, and extra-fine. The good news? You can easily sort your homemade bulgur into these sizes using a sieve! Depending on how you plan to use your bulgur, you might prefer a coarse texture for pilafs, medium for tabbouleh, or extra-fine for soups and baking. Here’s how to separate the grains.
Which sieve should you use? If you want to get as precise as possible, here are the recommended sieve mesh sizes:
- Coarse Bulgur: Use a #8 mesh sieve (2.38 mm openings)
- Medium Bulgur: Use a #14 mesh sieve (1.41 mm openings)
- Fine Bulgur: Use a #20 mesh sieve (0.84 mm openings)
- Extra-Fine Bulgur: Use a #40 mesh sieve (0.42 mm openings)
These sizes match standard grain sieving practices, helping you achieve a texture similar to store-bought bulgur.
What if you don’t have a sieve? No worries! You can still separate the grains by hand using a fine-mesh kitchen strainer for smaller pieces and leaving the larger ones aside. Even without specialized sieves, you’ll still get a great variety of textures for different recipes. By taking this extra step, you’ll have the perfect homemade bulgur for whatever dish you’re making—whether it’s pilaf, a fresh salad, or a simple soup
How to Store
Store the bulgur wheat in an airtight container in a cool, dry location for up to 6 months (it should last more than 12 months, but I try to use each batch within 6). You can also freeze it for several years!
How to Use Bulgur Wheat
Bulgur wheat is a whole grain and can be used in many ways that other grains can. Here are just a few ways you can use bulgur wheat:
- Use in salads – like Lebanese tabbouleh salad or Kamounit Banadoura (bulgur wheat salad).
- As part of Mujadara Hamra (Lentils & Bulgur)
- Use to make a pilaf dish (pilav/pilau).
- Turn into a porridge (fine bulgur) or puddings.
- Use in place of brown rice or couscous in recipes.
- Add to soups and stews.
- Use it to stuff veggies – like stuffed peppers or stuffed tomatoes .
- Add it to baked goods like bread and muffins.
As bulgur wheat is made using wheat, it is NOT gluten-free. For a gluten-free alternative, you could use quinoa. To do so, cook and dry it (no need to “crack”/crush it). This works particularly well when using it for tabbouleh – as would crushed walnuts.
No, several recipes (like tabbouleh) simply soak to “rehydrate” the wheat. However, for more tender results, you could cook the wheat.Â
In terms of nutritional properties, yes. Bulgur contains more protein and fiber in comparison to rice. It also has a lower glycemic index than rice and is considered a whole grain – meaning the entire wheat kernel is eaten (germ, endosperm, and bran). In terms of nutrients, bulgur is a particularly good source of iron, manganese, and magnesium. However, for those sensitive to wheat, it’s best to only eat it in small amounts; otherwise, it could cause intestinal upset.
Bulgur wheat has a slightly nutty flavor and chewy texture, similar to quinoa or couscous.Â
There are two ways to “cook” the prepared bulgur wheat – one is the “soak method” and the other boils the bulgur to cook it fully. The soak method: use the soak method for fine and medium bulgur only. Combine the bulgur with boiling water in a 1:1 ratio. For fine-grind bulgur, allow it to soak for 8 minutes; for medium-grind, then soak for around 15 minutes. To cook bulgur: avoid this method when using fine-ground bulgur. Combine 1 cup bulgur to 1 ½ cups salted water (or vegetable stock) and bring to a boil, then cover with a lid, reduce the heat to a gentle simmer and cook for 12 minutes for medium-grind bulgur (20 for coarse, and around 25 for extra-coarse grind). Then remove it from the heat and allow it to rest and steam for a further 10 minutes (all liquid should be absorbed at this point. If they need a little longer cooking, replace the lid and allow it to sit for a few more minutes). Then fluff it up with a fork and enjoy! Alternatively, combine the bulgur with 2 ½ cups of water (or stock), cook, and then drain the excess liquid (like pasta), rather than leaving it to steam. When you’re using packaged bulgur wheat that doesn’t state its coarseness, it’s likely medium.Â
Method Top Tips
- Be careful not to overprocess the wheat: otherwise, you’ll end up with a ton of very fine particles and not enough medium/coarse ones.
- Grind in batches : this is important for avoiding over-griding and making the grinding process easier to control.
- Don’t skip sieving : if you don’t, you’ll find that the very fineparticles will become a paste-consistency in the time it takes to cook the largest pieces (which won’t cook fully with the soak method).
Related Recipes & DIYs
- How to make chickpea flour
- How to make rye flour (pumpernickel flour)
- Homemade lentil flour
- How to make oat flour
- How to perfectly cook quinoa
- Perfectly fluffy brown rice
- Homemade powdered milk
- How to Make Baking Powder – also check my detailed post on Baking Soda vs Baking Powder
If you try this method on how to make bulgur whea t at home, I’d love to hear your thoughts/questions below. Also, I’d appreciate a recipe card rating below, and feel free to tag me in your recipe recreations on Instagram @Alphafoodie !
Equipment
- Grain grinder
IngredientsUS CustomaryMetric1x2x3x
- ▢ 3.5 oz wheat I recommend durum wheat
Instructions
Step 1: Soak the wheat
- Transfer the wheat to a large bowl with enough cold water to cover it by 2-inches. Leave it to soak overnight. Quick soak method: Alternatively, you can use boiling water and leave it to soak for around 2-3 hours.
Step 2: Cook the wheat
- Cook the wheat berries until al dente. To do this, combine the wheat and enough water to cover them with at least an inch of water. Bring to a boil, then simmer for between 60-80 minutes. The wheat is ready when it breaks down when pressed between your finger and thumb.
Step 3: Leave it to dry
- There are three ways to leave the wheat to dry: air-drying, in the oven, or using a dehydrator. To air-dry , spread the wheat in a single layer across a large tray (or multiple trays if needed). Then leave until fully dry. This method is best done in warm/dry climates and can take up to 2 days to fully dry. Alternatively, you can spread them across dehydrator trays or oven trays and dehydrate at 100 ºF/40 ºC (if your oven goes that low) until fully dried – which should only take a few hours. Lastly, you could spread them across baking trays in the oven at 200 ºF/95 ºC until they are dried enough to “crack” easily – this is usually between 1-2 hours.Â
Step 4: Grind the wheat
- You can either use a blender, grain mill, spice grinder, or even a ziplock bag and a rolling pin to crack the wheat. The amount you grind them for will impact their coarseness. I recommend doing this in small batches so you don’t over-blend/process the grains closest to the blade. When using a spice grinder, I recommend using it for 20-30 seconds, shaking a little. For a high-speed blender, pulse and shake the jug to more evenly grind the wheat.
- Sift/sieve the mixture to separate the different coarseness of the bulgur wheat. First, use a fine-mesh sieve to first strain the “floury” consistency (this can be used as superfine/fine bulgur for puddings, etc.). Then use a sieve with slightly larger holes to sift once more. The sifted bulgur will be a “medium coarseness” bulgur. The remaining unsifted bulgur wheat will be a combination of coarse/extra-coarse. If you want to get as precise as possible, check the blog post for the recommended sieve mesh sizes.
How to Store
- Store the bulgur wheat in an airtight container in a cool, dry location for up to 6 months (it should last more than 12 months, but I try to use each batch within 6). You can also freeze it for several years! Cooked bulgur: if you decide to cook the bulgur (method in the FAQs), you can store any leftovers in an airtight container in the fridge for up to 4 days or within the freezer for 10-12 months.
Notes
- Be careful not to overprocess the wheat:  otherwise, you’ll end up with a ton of very fine particles and not enough medium/coarse ones.Â
- Grind in batches : this is important for avoiding over-griding and making the grinding process easier to control.
- Don’t skip sieving : if you don’t sieve, you’ll find that the very fine/fine particles will become a paste-consistency in the time it takes to cook the largest pieces (which won’t cook fully with the soak method).
Nutrition
Nutrition information is automatically calculated, so should only be used as an approximation.
How to Make Bulgur Wheat at Home
Equipment
- Grain grinder
Ingredients
- 3.5 oz wheat I recommend durum wheat
Instructions
Step 1: Soak the wheat
- Transfer the wheat to a large bowl with enough cold water to cover it by 2-inches. Leave it to soak overnight. Quick soak method: Alternatively, you can use boiling water and leave it to soak for around 2-3 hours.
Step 2: Cook the wheat
- Cook the wheat berries until al dente. To do this, combine the wheat and enough water to cover them with at least an inch of water. Bring to a boil, then simmer for between 60-80 minutes. The wheat is ready when it breaks down when pressed between your finger and thumb.
Step 3: Leave it to dry
- There are three ways to leave the wheat to dry: air-drying, in the oven, or using a dehydrator. To air-dry , spread the wheat in a single layer across a large tray (or multiple trays if needed). Then leave until fully dry. This method is best done in warm/dry climates and can take up to 2 days to fully dry. Alternatively, you can spread them across dehydrator trays or oven trays and dehydrate at 100 ºF/40 ºC (if your oven goes that low) until fully dried - which should only take a few hours. Lastly, you could spread them across baking trays in the oven at 200 ºF/95 ºC until they are dried enough to “crack” easily - this is usually between 1-2 hours.
Step 4: Grind the wheat
- You can either use a blender, grain mill, spice grinder, or even a ziplock bag and a rolling pin to crack the wheat. The amount you grind them for will impact their coarseness. I recommend doing this in small batches so you don’t over-blend/process the grains closest to the blade. When using a spice grinder, I recommend using it for 20-30 seconds, shaking a little. For a high-speed blender, pulse and shake the jug to more evenly grind the wheat.
- Sift/sieve the mixture to separate the different coarseness of the bulgur wheat. First, use a fine-mesh sieve to first strain the “floury” consistency (this can be used as superfine/fine bulgur for puddings, etc.). Then use a sieve with slightly larger holes to sift once more. The sifted bulgur will be a “medium coarseness” bulgur. The remaining unsifted bulgur wheat will be a combination of coarse/extra-coarse. If you want to get as precise as possible, check the blog post for the recommended sieve mesh sizes.
How to Store
- Store the bulgur wheat in an airtight container in a cool, dry location for up to 6 months (it should last more than 12 months, but I try to use each batch within 6). You can also freeze it for several years! Cooked bulgur: if you decide to cook the bulgur (method in the FAQs), you can store any leftovers in an airtight container in the fridge for up to 4 days or within the freezer for 10-12 months.
Notes
- Be careful not to overprocess the wheat: otherwise, you’ll end up with a ton of very fine particles and not enough medium/coarse ones.
- Grind in batches : this is important for avoiding over-griding and making the grinding process easier to control.
- Don’t skip sieving : if you don’t sieve, you’ll find that the very fine/fine particles will become a paste-consistency in the time it takes to cook the largest pieces (which won’t cook fully with the soak method).
Nutrition
Recipe on Alphafoodie: https://www.alphafoodie.com/how-to-make-bulgur-wheat-at-home/
