Ingredient Guides
How To Make Chickpea Flour
By Samira Kazan
updated March 23, 2021
Two simple methods for homemade chickpea flour (garbanzo bean flour) – an excellent gluten-free flour option for a wide variety of your baking needs.
It may seem like I’m a bit chickpea obsessed, especially if you’ve noticed that my number of chickpea-related recipes and DIYs is going up every single week. What can I say, I love this ingredient! Learning how to make chickpea flour is incredibly simple, and it can then be used for your delicious gluten-free baked goods and a variety of comfort foods.
It’s wonderful learning to make things from scratch and knowing that you have that knowledge forever more. It also makes you appreciate the food that you’re putting into your body even more – knowing that you have made these ingredients personally.
In fact, this post contains TWO methods for making homemade chickpea flour: one with dried chickpeas and, my preferred method, using soaked and then dried chickpeas. I’ll explain why below.
Want to save this recipe?
- How to make chickpea flour
- How To Make Chickpea Flour Recipe
Notes
- Gluten-free flours often need slightly different amounts within a recipe. For example, substitute 1 cup of regular flour for 3/4 cup of chickpea flour.
- I know some will ask why we don’t use cooked beans for this. Because we will cook the flour in whatever recipe it’s used in, the chickpeas don’t need to be pre-cooked.
- I’ll often soak enough chickpeas so I can use some for chickpea flour (gram flour) and will then cook some and freeze them for meals (saving the cooking liquid to use as aquafaba).
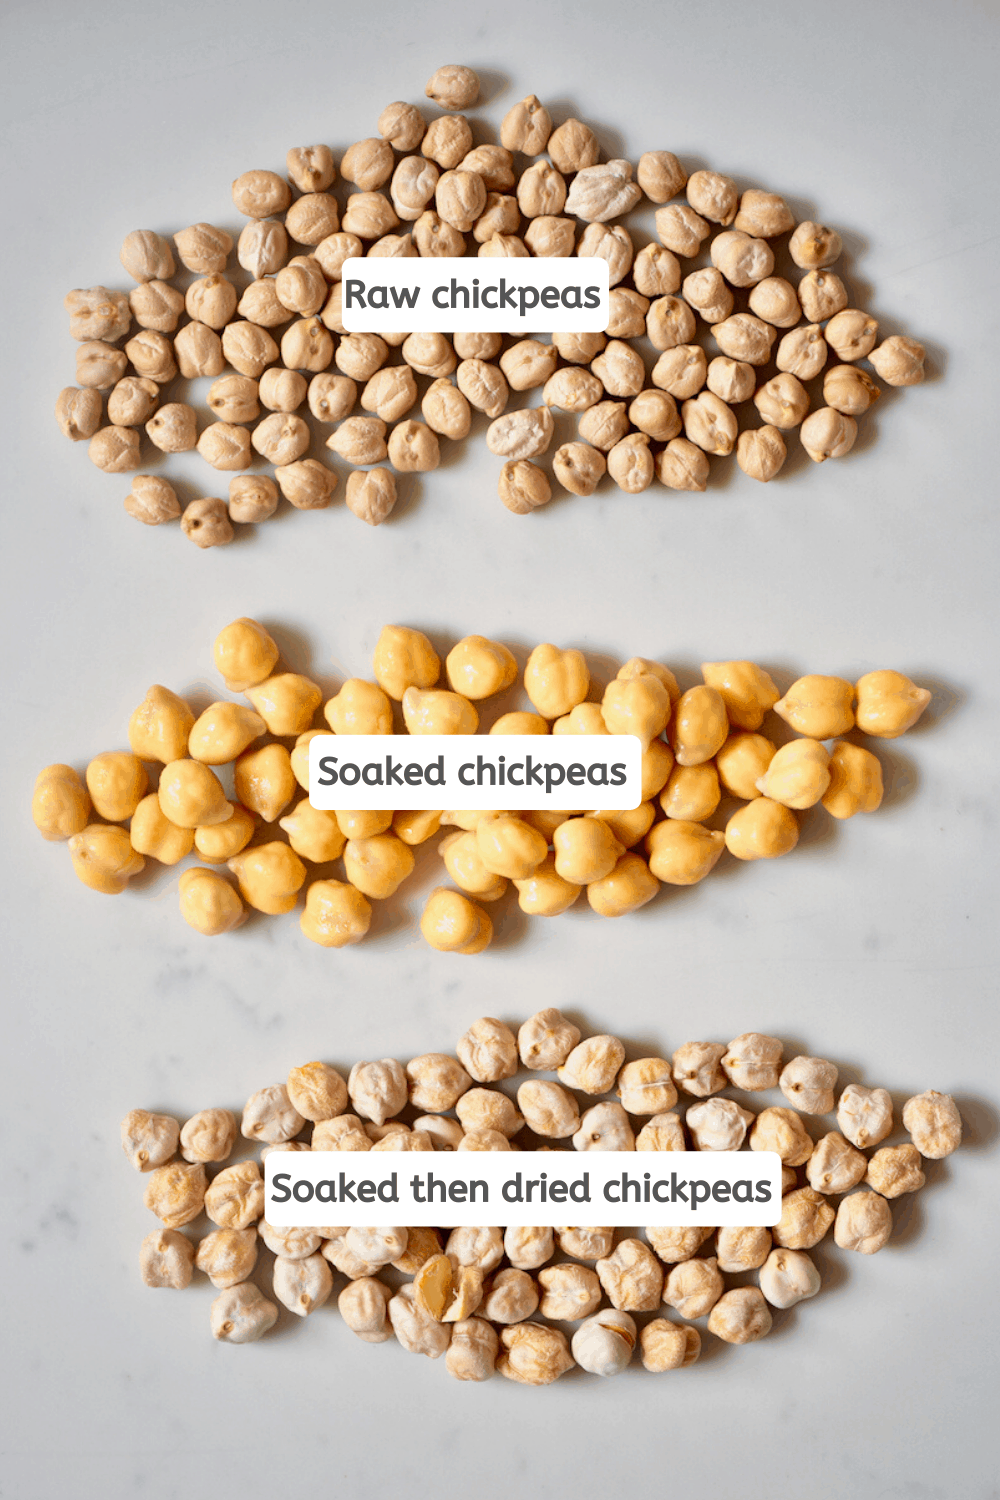
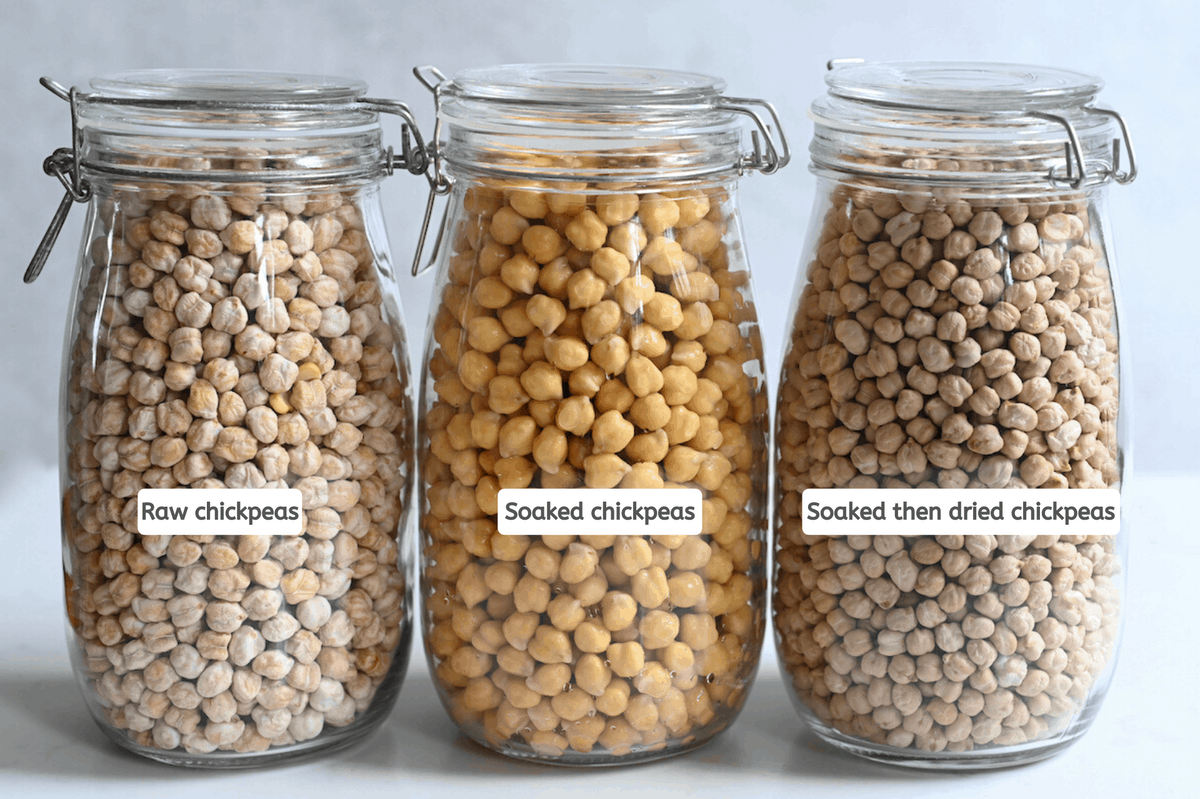
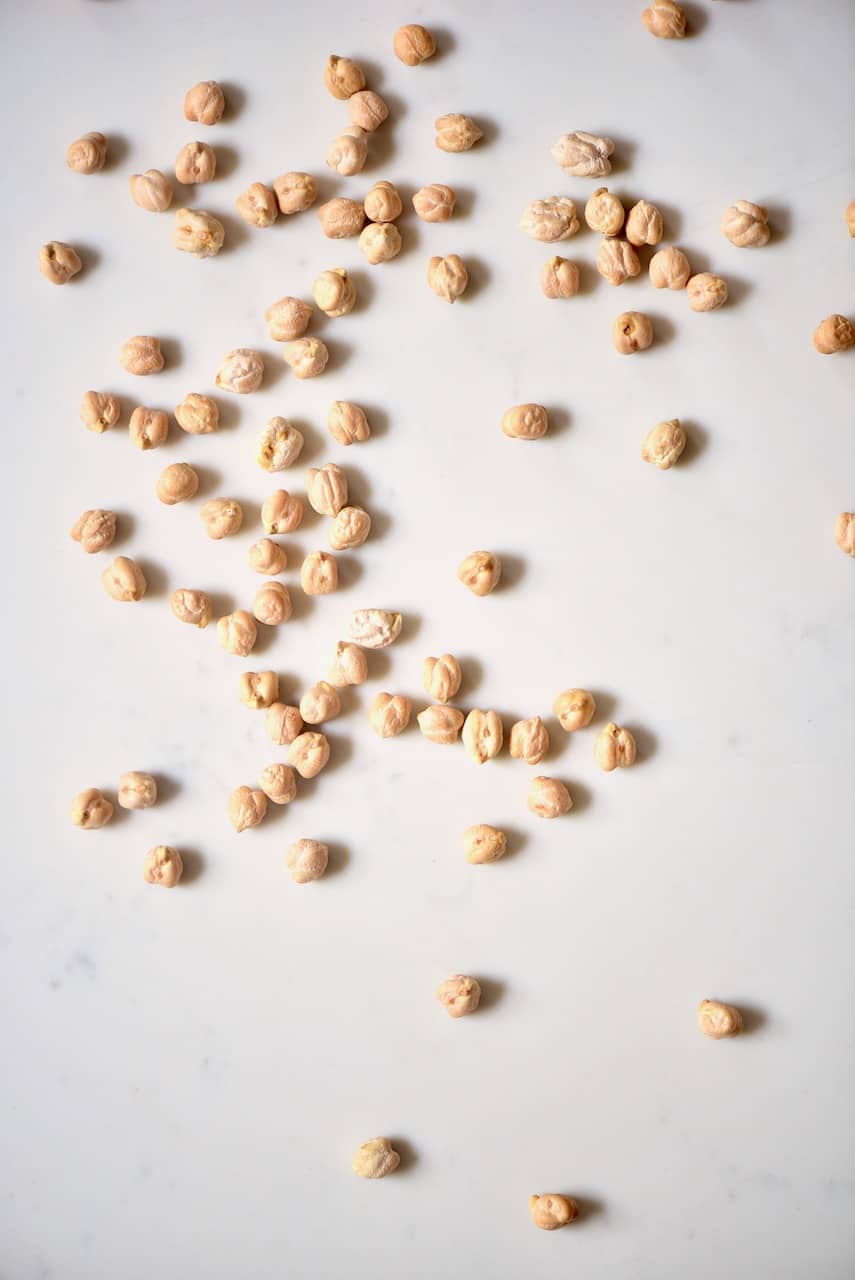
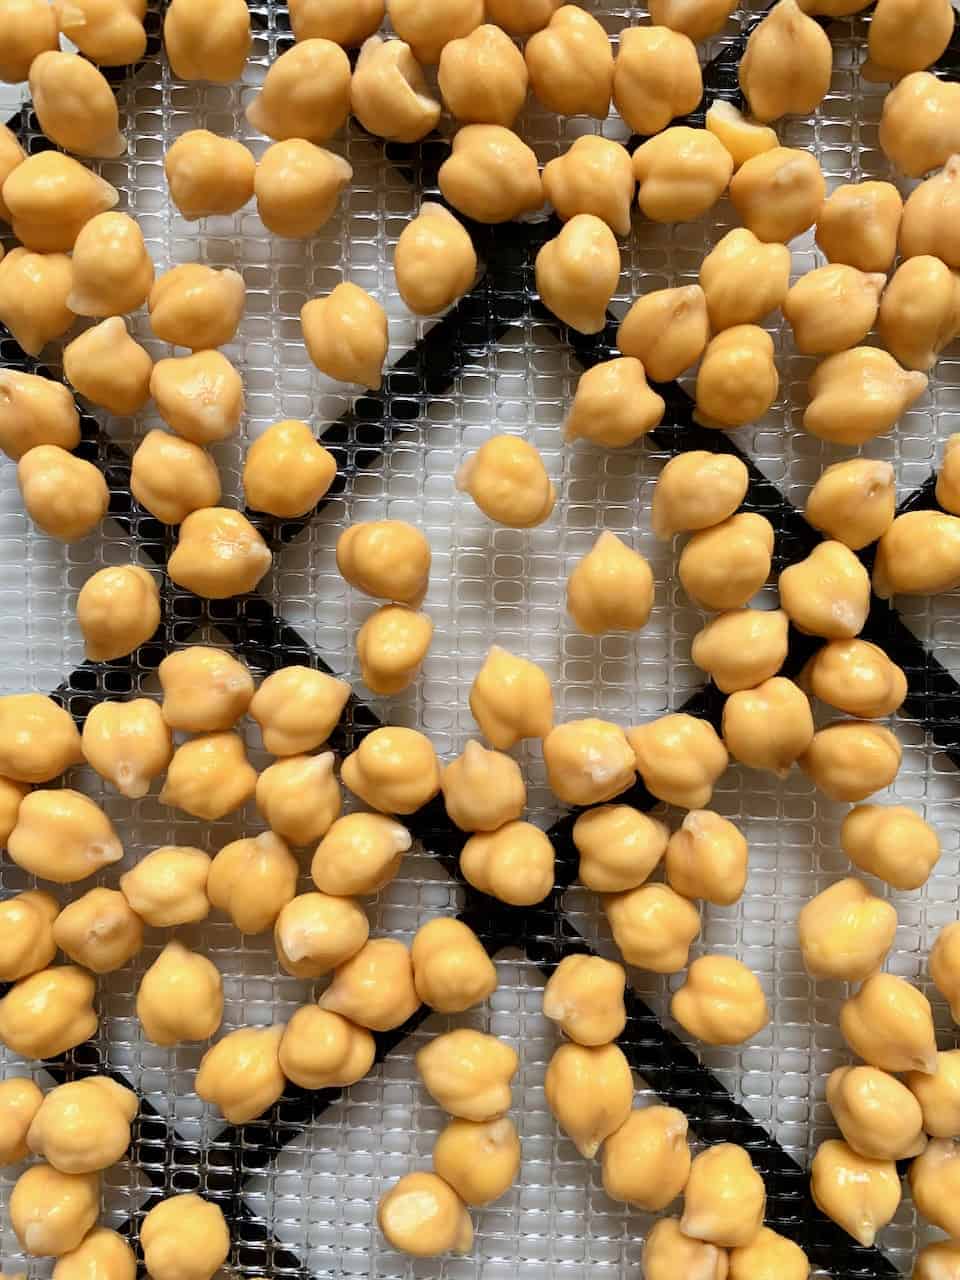
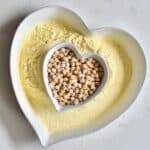
- Below is an image of dried chickpeas (store-bought), rehydrated (soaked) chickpeas, and dehydrated chickpeas. It’s best to label your containers of the store-bought dried and dehydrated, so they’re not mixed up.
How to make chickpea flour
Needed:
- Dried chickpeas
The two methods
Option 1:
A lot of people directly grind the store-bought dried chickpeas into flour. I am not a big fan of this option since the chickpeas usually are never washed before packaging and could be sprayed with nasty chemicals to prolong their shelf life. Now I know that cooking will remove/kill the germs, but I’d rather they not to be present before processing the chickpeas into flour.
However, if you’re buying organic chickpeas that aren’t sprayed with any pesticide, etc., then this method is a super-quick ‘instant’ chickpea flour.
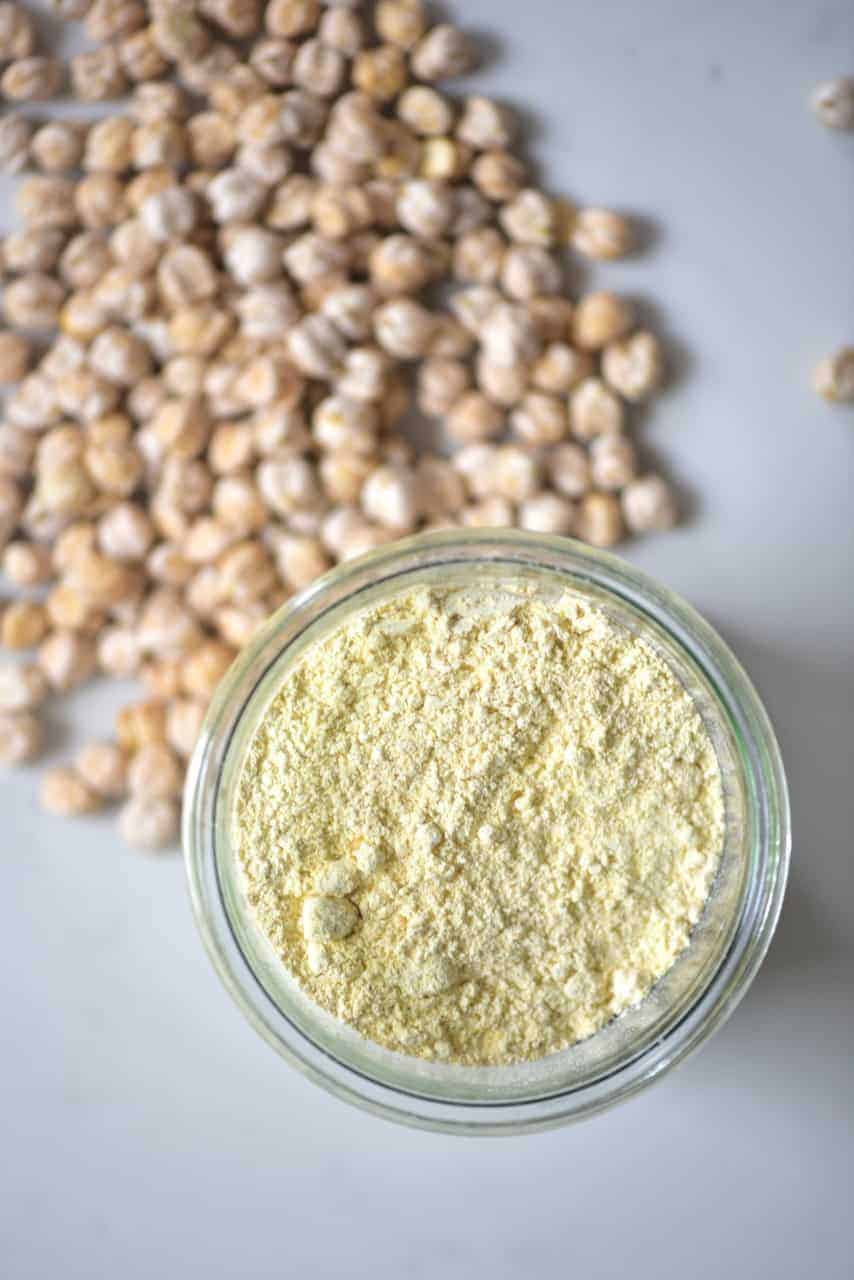
Simple, place your chickpeas in a coffee/spice grinder or high-speed blender, and grind them into a fine powder.
Sieve the flour, to remove any larger lumps, and then you can re-grind these too.
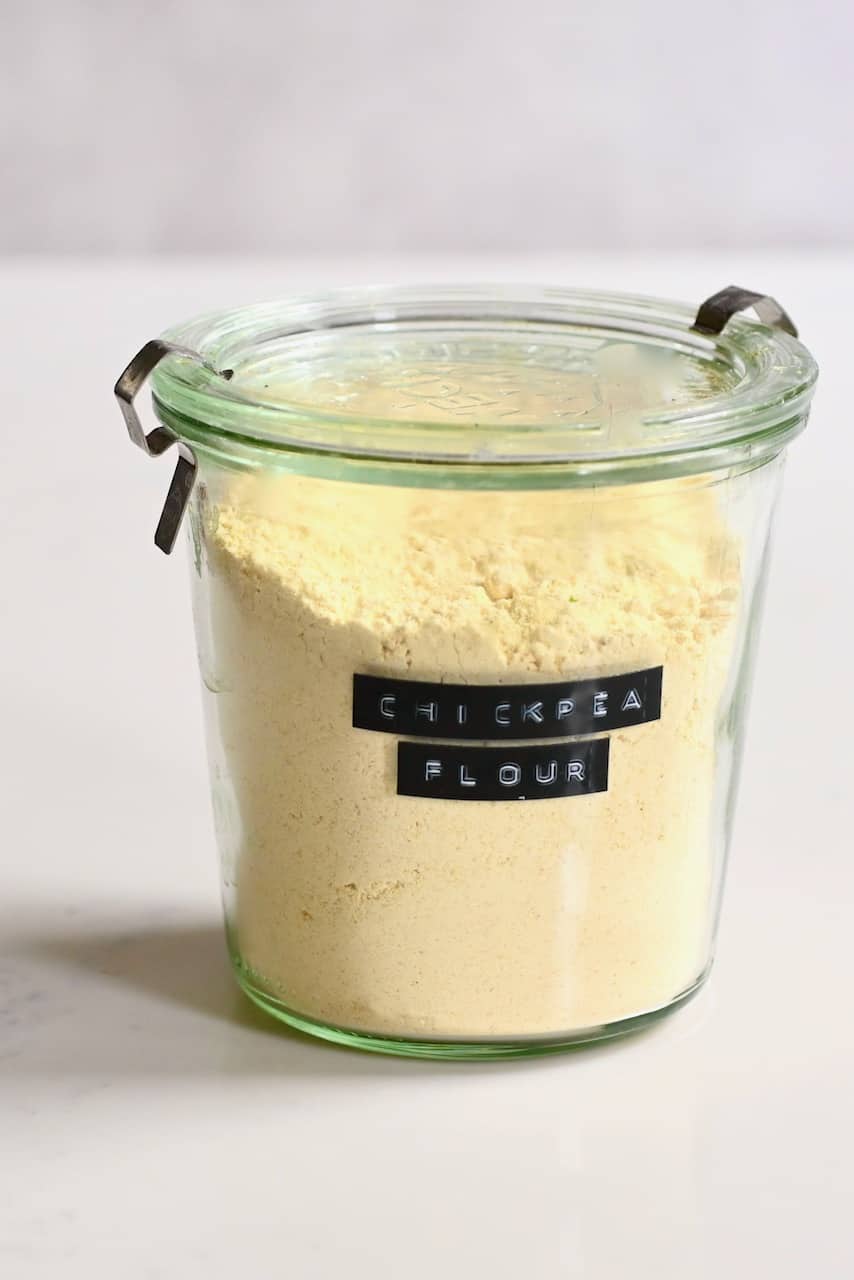
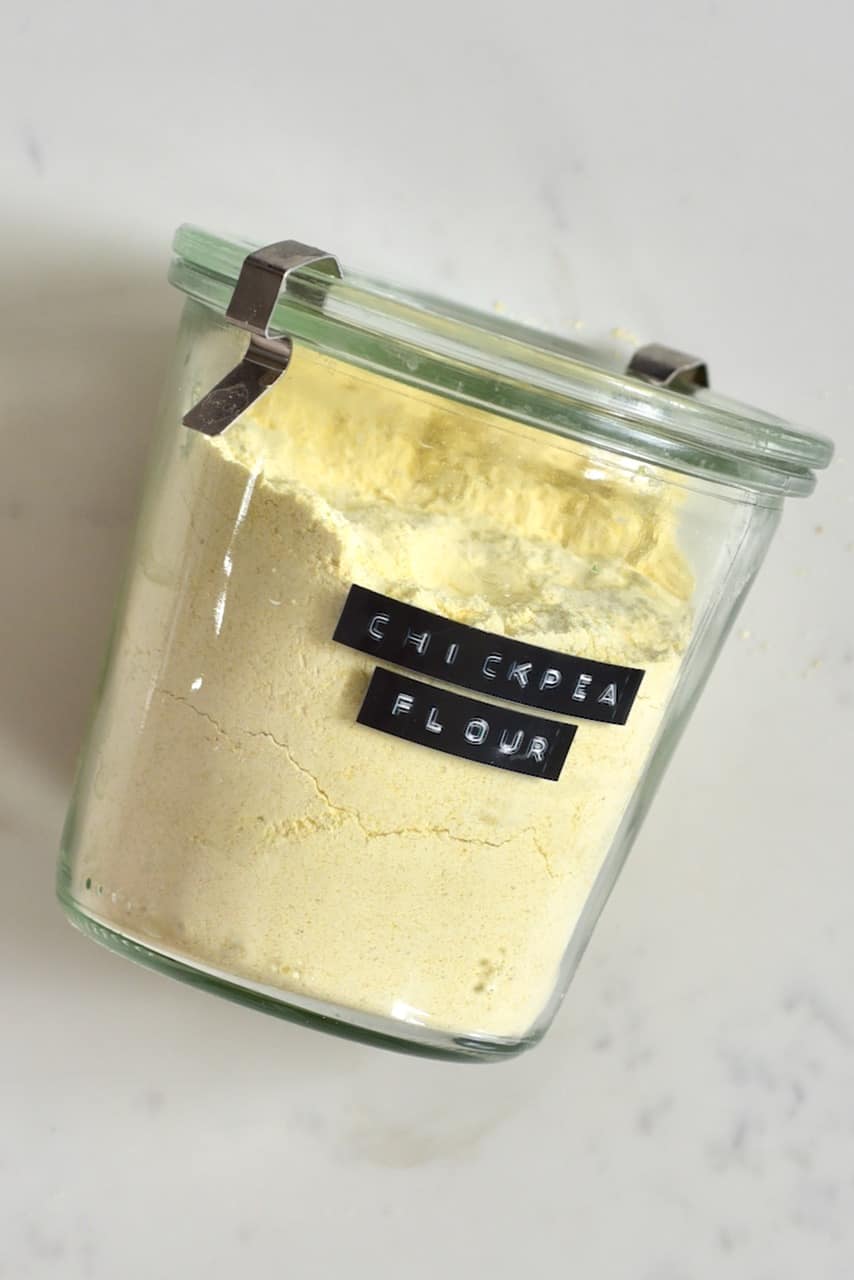
Once ready, store your chickpea flour in an airtight container for up to two months.
Option 2 (my preferred method):
This option is a longer process (although the actual hands-on time is near-identical), making sure that the chickpeas are cleaned and soaked, before being dried and ground into flour. This will make sure there’s no pesticide/nasty residue on the chickpeas and soaking is also said to increase their nutritional value and are easier digested.
For this method, first, rinse your dried chickpeas.
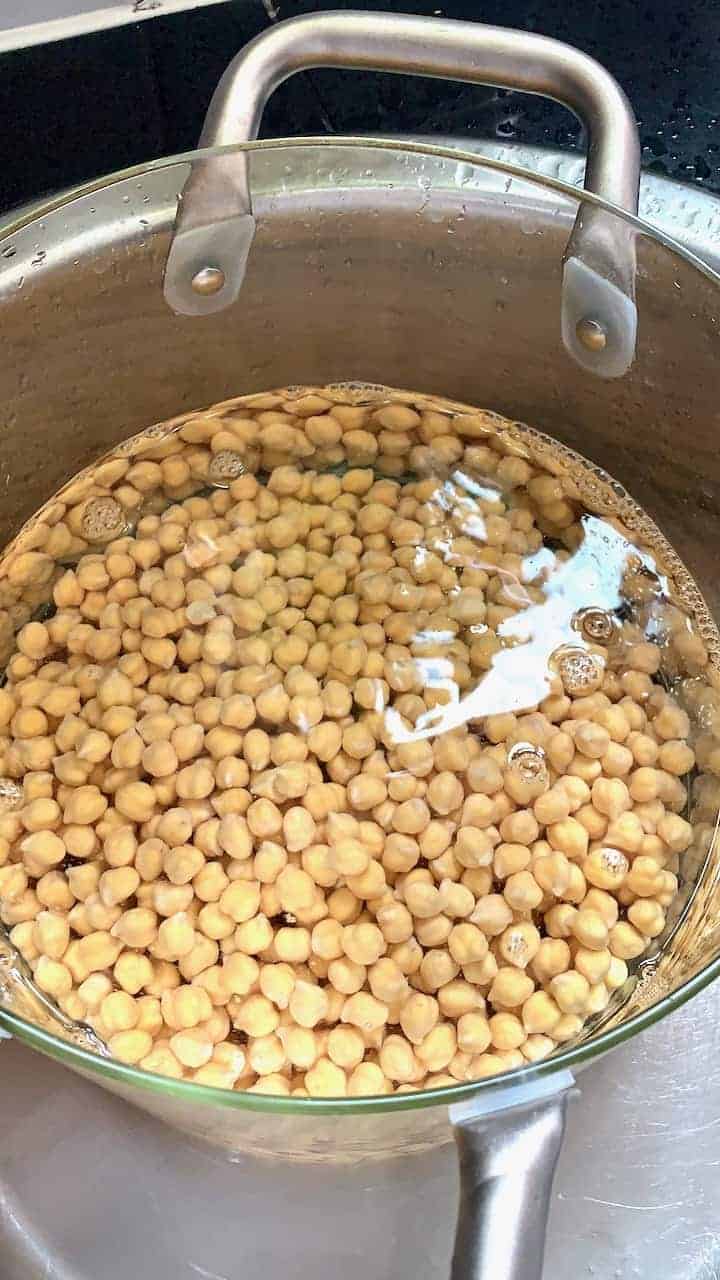
Then, soak them overnight (minimum of 8 hours, and you can go up to 24 hours). Make sure to cover them with enough water (usually a few inches of water above the chickpeas) as they will expand 2-3 times their size.
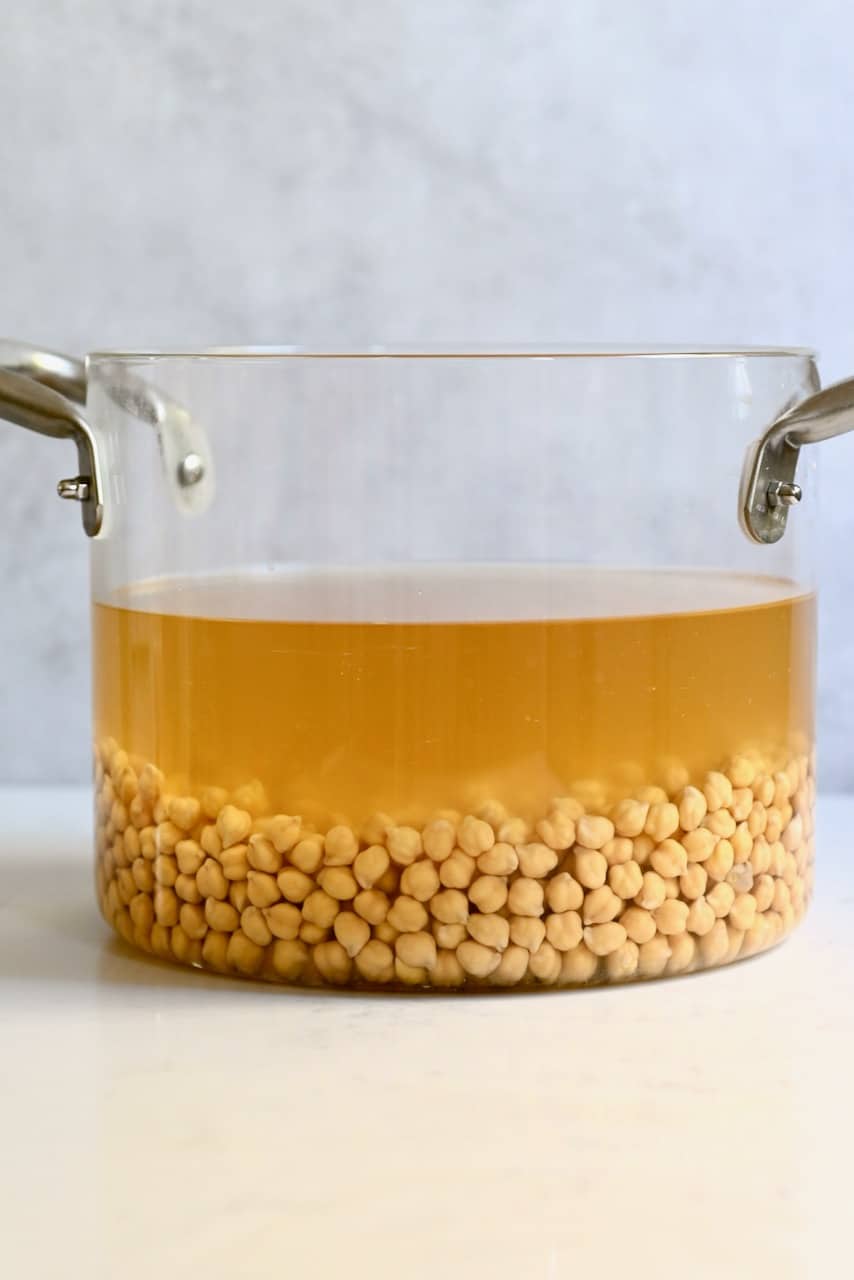
Once soaked, drain the water (or use it to water your plants) and pat them dry thoroughly.
Note* I’ll often soak enough chickpeas to make some flour as well as cook and freeze some for later dishes. You can see the full guide on how to cook dried chickpeas (as well as prep, freeze and even store the cooking liquid to use as aquafaba).
Now we need to dry (dehydrate) the chickpeas. Place them on a large tray (a baking sheet or dehydrator tray will work). Make sure to place them in a single layer (not overlapping at all); otherwise, the drying process can take far longer.
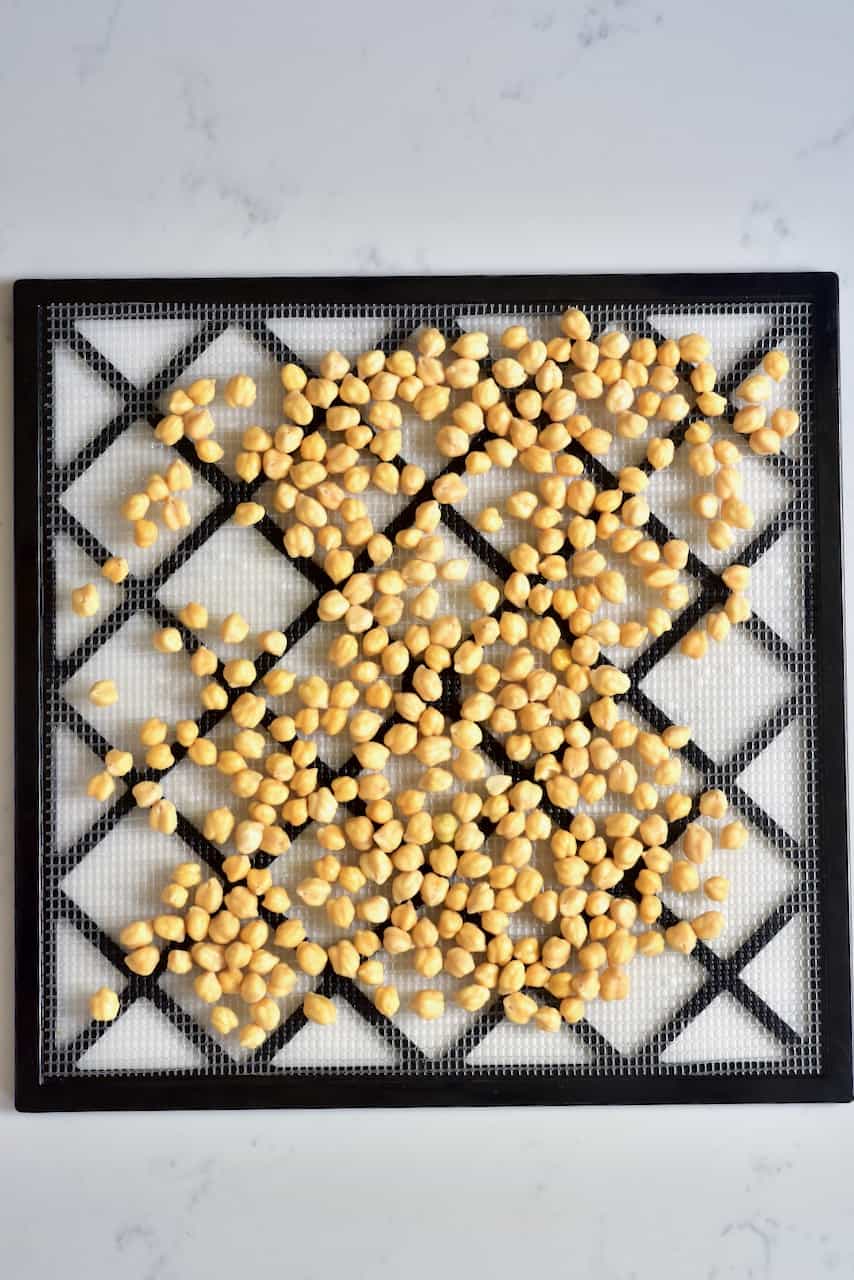
You can let them dry out in a sunny warm spot or dry them in the dehydrator or oven at 50ºC for 12 hours.
I dried mine in a dehydrator, just because it’s far quicker than letting them air out.
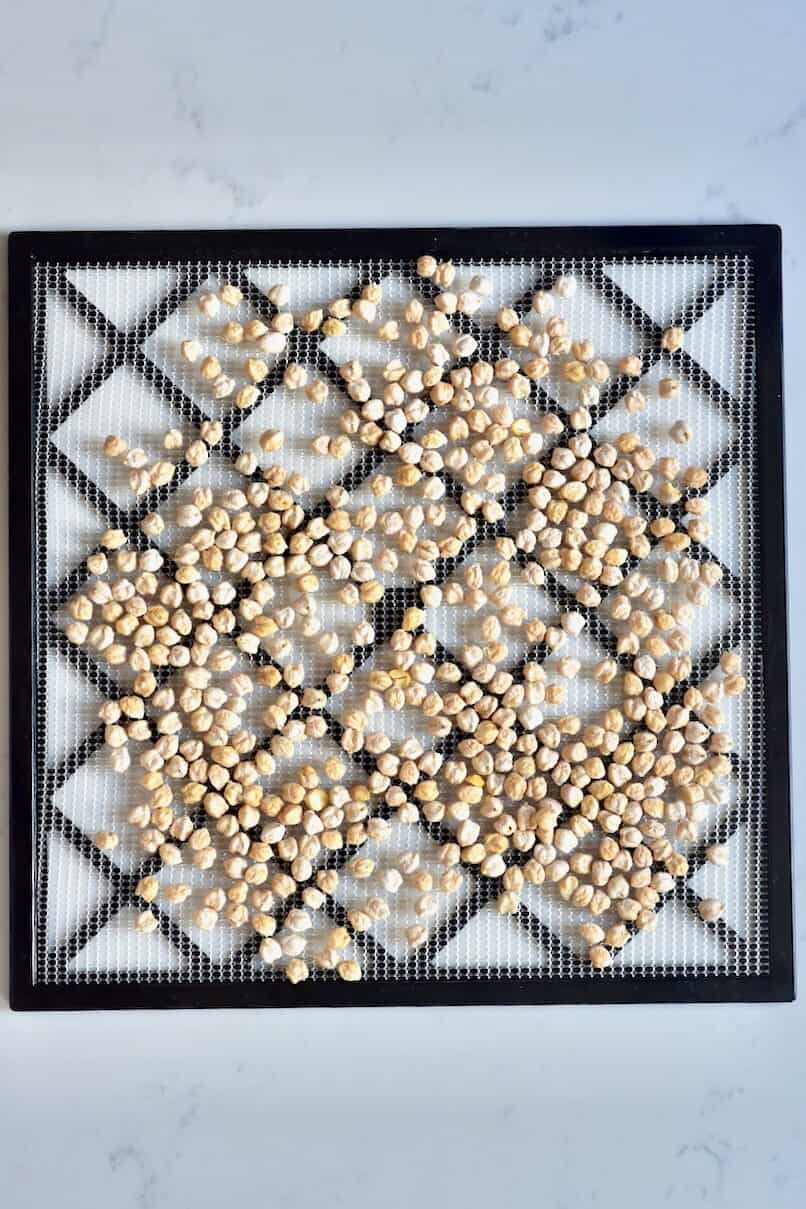
The chickpeas need to be completely dry before we grind them. Otherwise, they will be mushy, and you’ll end up with a mash and not a fine powder.
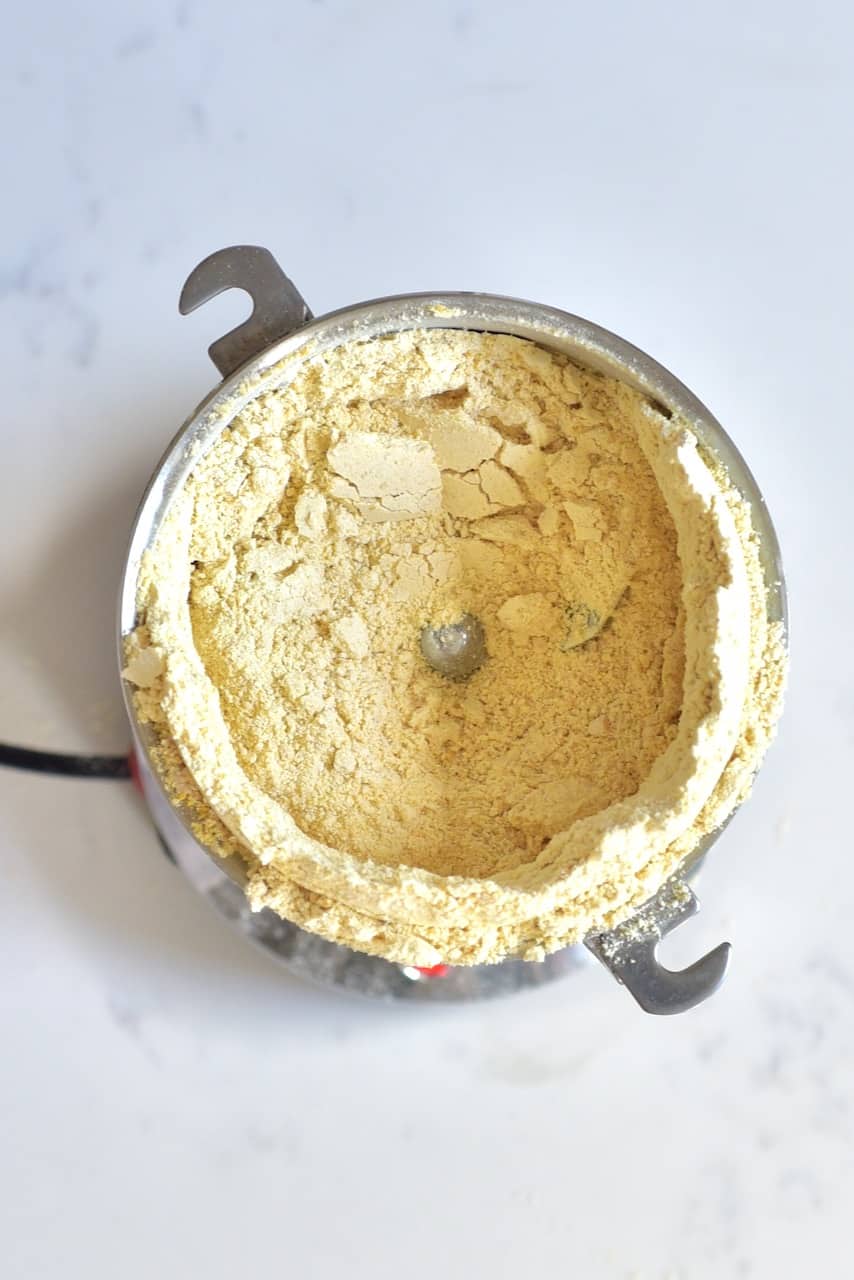
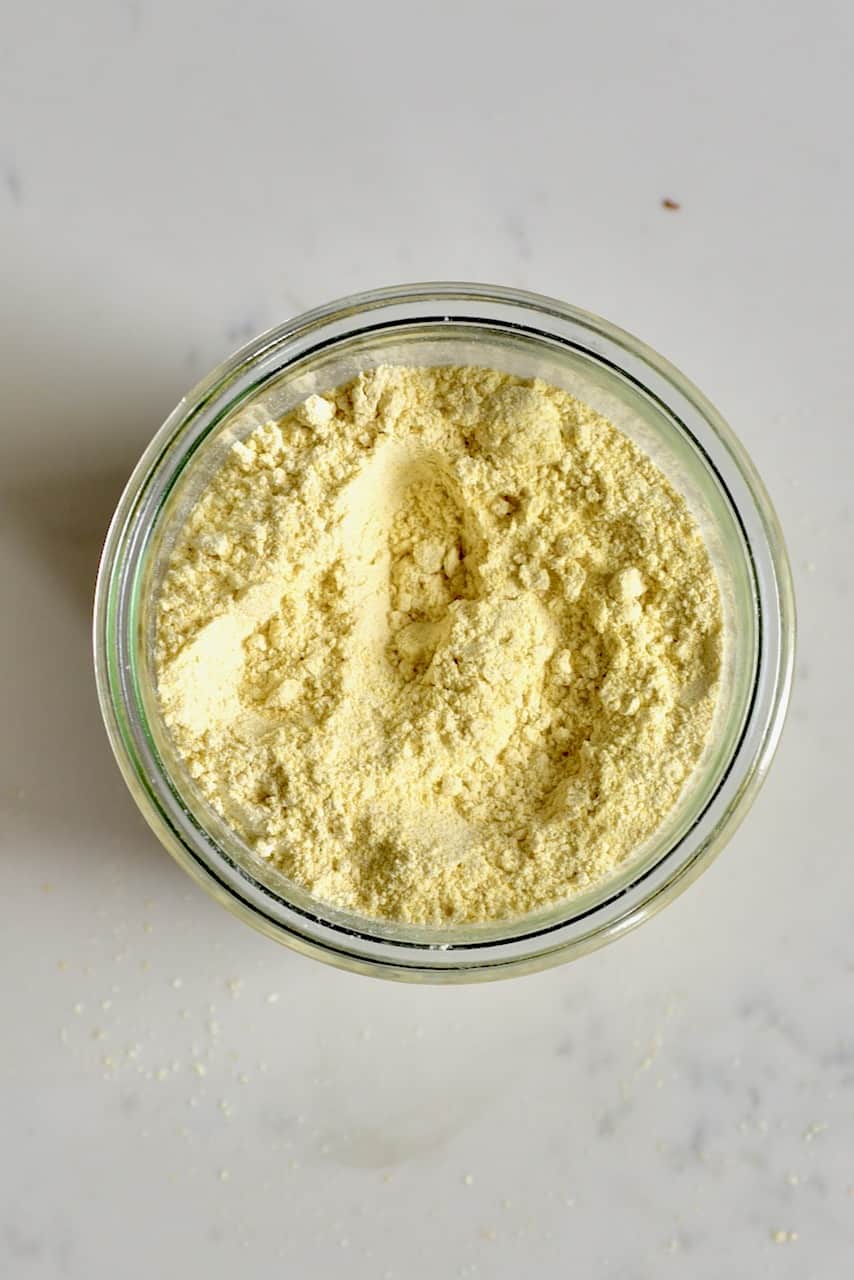
When the chickpeas are completely dry, grind them.
You can blend them in a high-speed food processor/blender or grind them to a fine flour in a spice grinder.
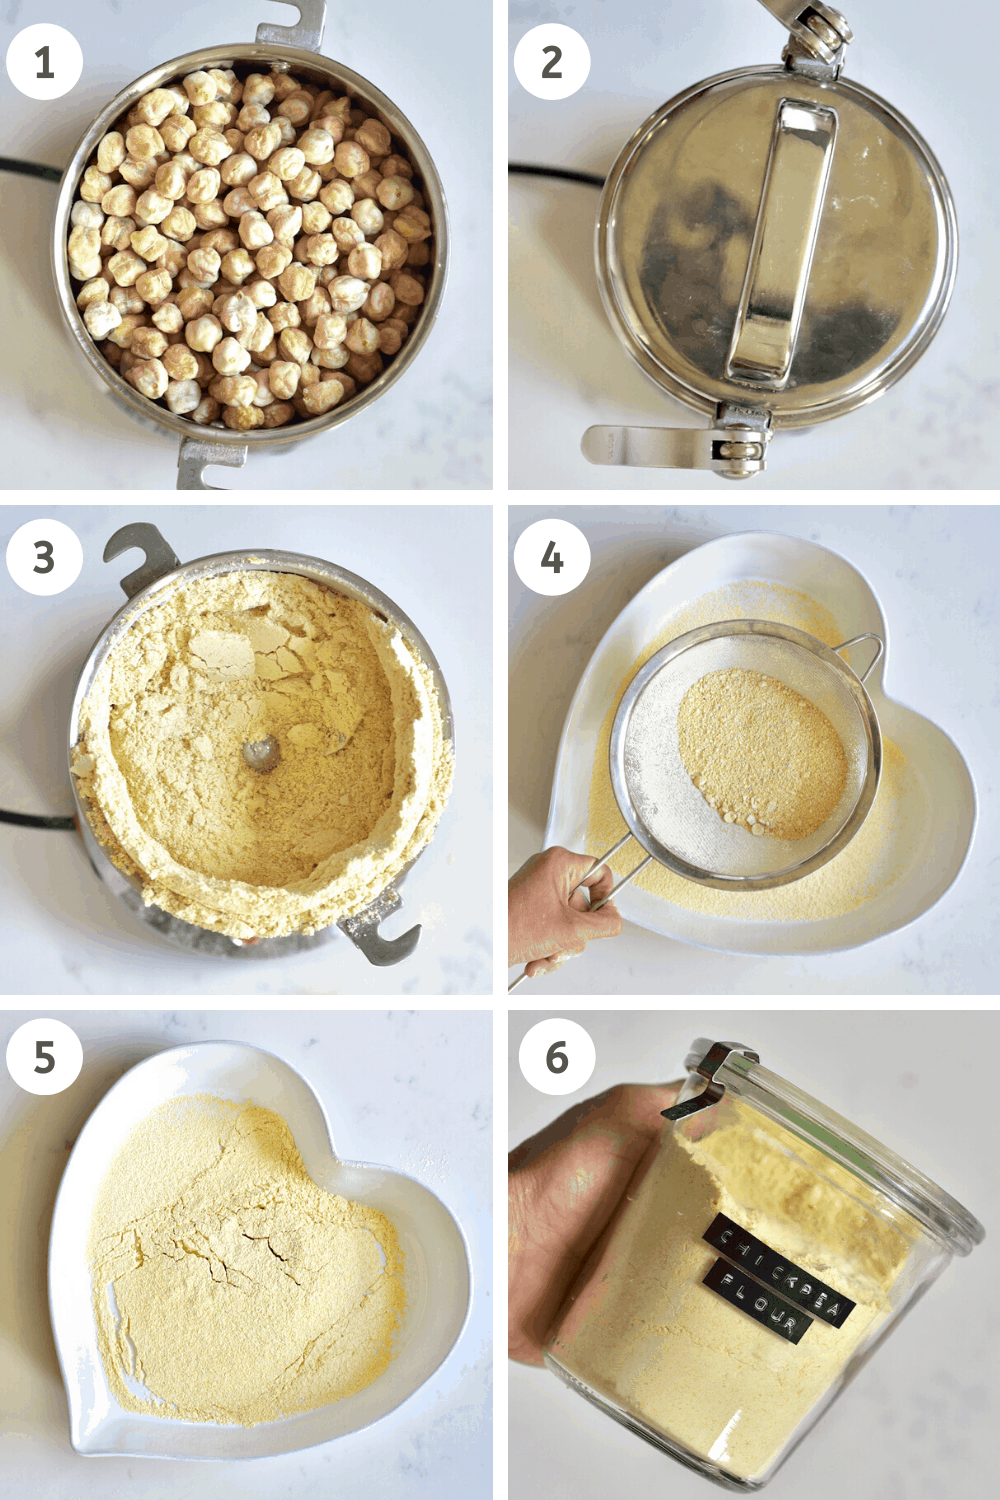
Sieve the flour to remove any lumps. Then, you can try grinding the larger particles again. If using a grinder, you’ll need to do this 2-3 tBsp at a time. Either method may require a few passes for all the chickpeas to become finely ground.

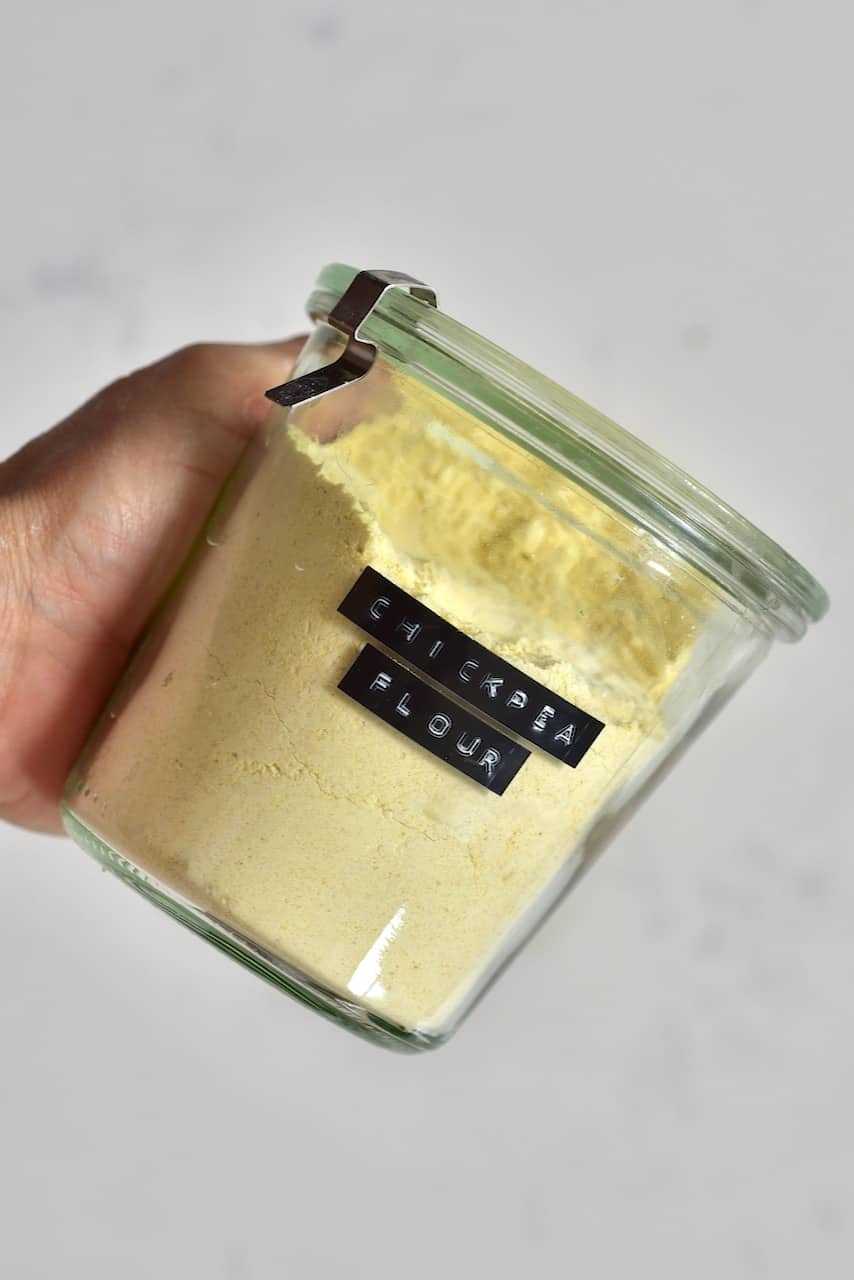
Once ready, transfer to an airtight jar of your choosing and store for up to two months.
Chickpea flour recipes and uses
There are tons of ways to use your freshly made chickpea flour, from using it to thicken up sauces and curries to an easy gluten-free flour swap.
Chickpea flour (gram flour) can also be used as a great binding agent (for fritters, veggie burgers, etc.) and is well-known for making pancake/crepe-like flatbreads (called Socca in France and Farinata in Italy). As well as other ‘bread’ – like tortillas, taco shells, etc.
But it can be used for so many recipe types: omelets, bread, cake, cookies, pizza, etc.
Equipment
- Pot
- Dehydrator or oven
- Grain grinder
- Airtight jar or another container for storing
Ingredients
- ▢ chickpeas
Instructions
Option 1
- Directly blend the dried chickpeas in a high-speed food processor/blender or grind them in a spice grinder.
- Sieve the flour to remove any lumps. Then try grinding the larger particles again. Store in an airtight container for up to 2 months.
Option 2 (my preferred method)
- First, soak the chickpeas overnight (minimum of 8 hours, and you can go up to 24 hours). Make sure to cover them with enough water as they will expand 2-3 times their size.
- Drain the water (you can use this to water plants) and rinse well the soaked beans. Then, pat them dry as much as you can.
- Dry the chickpeas in a sunny warm spot or alternatively, dry them in the dehydrator or oven at 50ºC for 12 hours. Lay them out in single layers across baking sheets (or the dehydrator trays), for the quickest dry time.
- When the chickpeas are completely dry, grind them. If they’re not completely dry then you’ll end up with a ‘paste’ rather than flour- so be patient. You can blend them in a high-speed food processor/blender or grind them to a fine flour in a spice grinder.
- Sieve the flour to remove any lumps. Then, you can try grinding the larger particles again. This may take a few passes to all become fully ground.
- Store in an airtight container for up to 2 months.
Video
Notes
- Gluten-free flours often need slightly different amounts within a recipe. For example, substitute 1 cup regular flour for 3/4 cup chickpea flour
- I know some will ask why we don’t use cooked beans for this. Because we will cook the flour in whatever recipe it’s used in, the chickpeas don’t need to be pre-cooked.
- I’ll often soak enough chickpeas so I can use some for chickpea flour (gram flour) and will then cook some and freeze them for meals (saving the cooking liquid to use as aquafaba).
How To Make Chickpea Flour
Equipment
- Pot
- Dehydrator or oven
- Grain grinder
- Airtight jar or another container for storing
Ingredients
- chickpeas
Instructions
Option 1
- Directly blend the dried chickpeas in a high-speed food processor/blender or grind them in a spice grinder.
- Sieve the flour to remove any lumps. Then try grinding the larger particles again. Store in an airtight container for up to 2 months.
Option 2 (my preferred method)
- First, soak the chickpeas overnight (minimum of 8 hours, and you can go up to 24 hours). Make sure to cover them with enough water as they will expand 2-3 times their size.
- Drain the water (you can use this to water plants) and rinse well the soaked beans. Then, pat them dry as much as you can.
- Dry the chickpeas in a sunny warm spot or alternatively, dry them in the dehydrator or oven at 50ºC for 12 hours. Lay them out in single layers across baking sheets (or the dehydrator trays), for the quickest dry time.
- When the chickpeas are completely dry, grind them. If they’re not completely dry then you’ll end up with a ‘paste’ rather than flour- so be patient. You can blend them in a high-speed food processor/blender or grind them to a fine flour in a spice grinder.
- Sieve the flour to remove any lumps. Then, you can try grinding the larger particles again. This may take a few passes to all become fully ground.
- Store in an airtight container for up to 2 months.
Video
Notes
- Gluten-free flours often need slightly different amounts within a recipe. For example, substitute 1 cup regular flour for 3/4 cup chickpea flour
- I know some will ask why we don’t use cooked beans for this. Because we will cook the flour in whatever recipe it’s used in, the chickpeas don’t need to be pre-cooked.
- I’ll often soak enough chickpeas so I can use some for chickpea flour (gram flour) and will then cook some and freeze them for meals (saving the cooking liquid to use as aquafaba).
Recipe on Alphafoodie: https://www.alphafoodie.com/how-to-make-chickpea-flour/
